Category: Health & Everyday Wellness

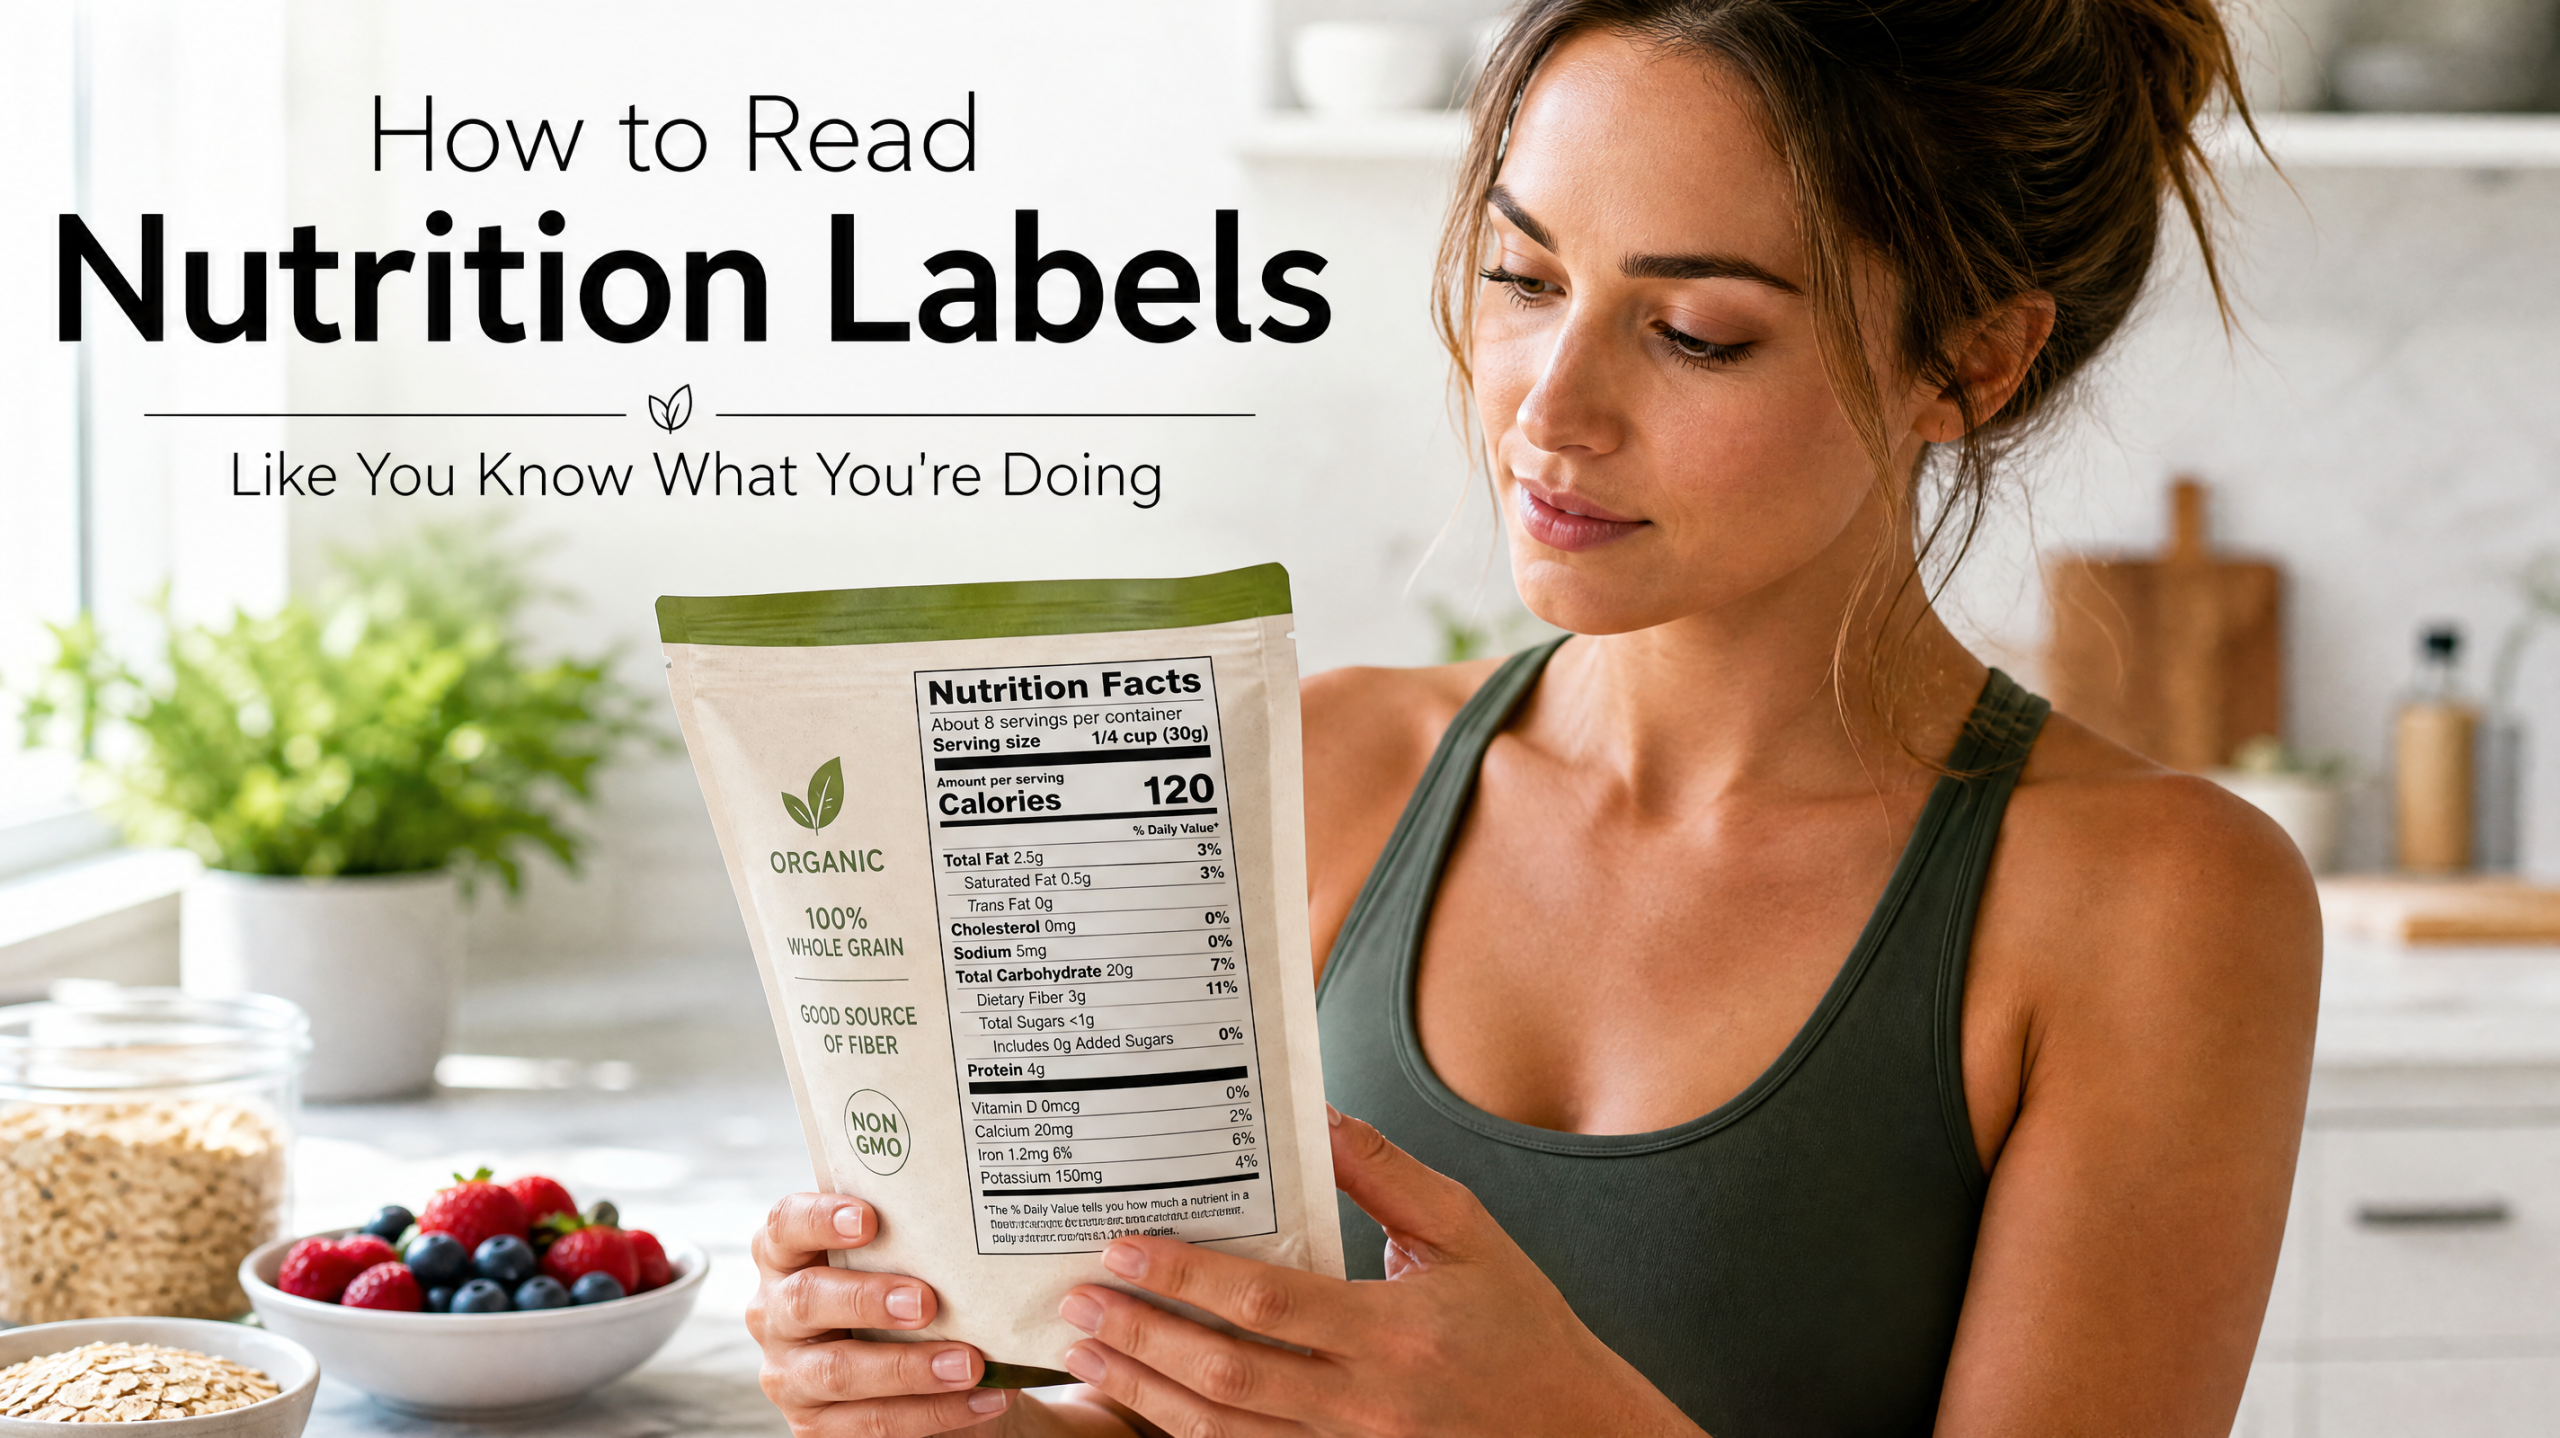
  • How to Read Nutrition Labels Like You Know What You’re Doing

    How to Read Nutrition Labels Like You Know What You’re Doing

    The Nutrition Facts label on packaged food is one of the most useful tools in any grocery store, and almost nobody reads it correctly. Most people glance at the calorie number, maybe check whether something says “low fat” on the front of the package, and put it in the cart. That misses the entire point of the label. According to the U.S. Food and Drug Administration’s official guidance on understanding and using the Nutrition Facts label, the label is designed to let you make quick, informed food decisions in roughly 15 seconds per item — but only if you know what to look at and in what order. This guide walks through the FDA’s system step by step, explains the parts that genuinely matter (and the parts that don’t), and shows you how to use the label without becoming obsessive about every gram of every nutrient.

    A quick framing note. This guide is not about which foods are “good” or “bad.” It’s about reading what’s in front of you accurately, so you can make informed choices based on your own goals — whether that’s eating more fiber, cutting sodium, watching added sugars, or just understanding what’s actually in your food. The label gives you the facts. What you do with them is up to you.

    The Single Most Important Thing on the Label

    Before you look at calories, fat, sugar, or anything else, look at the very top of the label: serving size and servings per container. Everything else on the label is per serving, not per package. This is where almost all label confusion starts.

    The FDA’s example uses a frozen lasagna: one cup equals one serving, with 280 calories. If the container holds 4 cups, eating the entire thing means consuming 4 servings — 1,120 calories, plus 4 times the sodium, sugar, and everything else listed. A bag of chips might say 150 calories per serving and look reasonable, until you notice the bag contains 3.5 servings. The whole bag is 525 calories, not 150.

    The FDA standardizes serving sizes specifically so you can compare similar products fairly. But the serving size on the label is not a recommendation of how much you should eat. It’s a description of how much people typically eat. Your actual portion might be smaller, the same, or larger. Multiplying or dividing the numbers to match your real portion is the first step in reading any label.

    Practical habit: before reading anything else, look at the serving size and ask yourself, “Am I going to eat one serving, half a serving, or two?” Then adjust every number on the label accordingly. This single step makes 80% of label reading dramatically more accurate.

    Calories: Useful, but Not the Whole Story

    After serving size, the calorie number is the largest text on the label — the FDA bolded it in the 2016 redesign specifically because most people use this number first. The FDA’s guidance notes that 2,000 calories a day is used as a general guide for nutrition advice, with individual needs varying by age, sex, height, weight, and physical activity level.

    Two things to remember about calories on labels:

    The number applies to the serving size, not the package. See above. A “150-calorie” snack with 3 servings in the package is a 450-calorie snack if you eat the whole thing.

    Calories alone don’t tell you about food quality. A 200-calorie portion of almonds and a 200-calorie portion of soda contain the same energy but radically different nutrient profiles. The nutrient section below the calorie count is where the actual quality information lives. If you only ever look at calories, you’re missing most of what the label is for.

    Calories matter, especially for weight management. But they’re a starting point for reading the label, not the entire decision.

    The 5% / 20% Rule (The Real Power Move)

    If you remember one thing from this article that you didn’t know before, make it this. The FDA’s Percent Daily Value (%DV) column, on the right side of the label, gives you a simple way to evaluate any nutrient at a glance — without doing any math.

    According to the FDA’s official guide:

    The General Guide to %DV

    5% DV or less of a nutrient per serving is considered LOW.

    20% DV or more of a nutrient per serving is considered HIGH.

    That’s the entire rule. You don’t need to memorize daily limits, calculate percentages, or know any specific nutrient amounts. The label does the math for you and converts everything to a 0–100% scale.

    Now apply it in the order the FDA recommends. For nutrients you want to limit — saturated fat, sodium, added sugars — choose products with lower %DV (closer to 5% or below). For nutrients you want more of — dietary fiber, vitamin D, calcium, iron, potassium — choose products with higher %DV (closer to 20% or above).

    Example from the FDA’s own sample lasagna label: one serving contains 37% DV of sodium. Using the 5%/20% rule, that’s clearly “high” — more than a third of an entire day’s sodium in one cup. If you eat two cups, you’re at 74% DV — nearly three-quarters of an entire day’s sodium from one meal. That’s information you can act on without needing to know that the daily limit is 2,300 mg.

    In the grocery store, this rule turns label-reading into a 5-second check: scan the %DV column for the nutrients you care about, see if the numbers are closer to 5% or 20%, and decide. No app, no calculator, no memorization.

    What the FDA Tells Us to Get Less Of

    According to the FDA’s nutrition label guidance, the nutrients identified for limiting are saturated fat, sodium, and added sugars — because Americans generally consume too much of them and excess intake is linked to elevated risk of cardiovascular disease, high blood pressure, and difficulty meeting other nutrient needs while staying within calorie limits.

    Saturated Fat

    The FDA’s Daily Value for saturated fat is 20 grams per day (which equals 100% DV). The guidance is to stay “less than” this amount over the course of the day. A single serving showing 23% DV for saturated fat means one serving alone provides almost a quarter of an entire day’s recommended limit. Trans fat does not have a %DV — but worth noting that most artificial trans fats in the U.S. food supply have been phased out as of 2018.

    Sodium

    The FDA’s Daily Value for sodium is 2,300 milligrams per day. Sodium is the nutrient most people unknowingly consume far too much of — most of it comes from processed foods, not from the salt shaker. A frozen meal at 37% DV for sodium, a savory snack at 25%, and a fast-food meal at 50%+ can easily push you over a day’s worth before dinner. Reading sodium %DV consistently is one of the most useful label-reading habits, particularly for people watching blood pressure.

    Added Sugars

    This is the most useful addition to the modern nutrition label, added in the FDA’s recent redesign. According to the FDA’s official guidance on added sugars, the Daily Value for added sugars is 50 grams per day based on a 2,000 calorie daily diet. The label distinguishes Total Sugars (naturally occurring sugars in milk and fruit, plus any added) from Added Sugars (those introduced during processing).

    This distinction matters a lot. A yogurt label might show 15g total sugars but only 7g added — meaning 8g comes from the milk itself and isn’t a processing addition. That’s very different from a soda that shows 39g total sugars and 39g added sugars. The total number is the same kind of question; the added number tells you about deliberate sweetening.

    A 20-ounce bottle of soda can contain about 66g of added sugars — that’s 132% of an entire day’s recommended limit in a single drink. Reading added-sugars %DV on beverages alone often changes purchasing behavior more than any other label-reading habit.

    What the FDA Tells Us to Get More Of

    The FDA also identifies five nutrients most Americans don’t get enough of: dietary fiber, vitamin D, calcium, iron, and potassium. For these, you want products with higher %DV — closer to 20% per serving, ideally.

    Dietary fiber (Daily Value 28g) supports digestion, helps with blood sugar control, and tends to make food more filling per calorie. Whole grains, beans, vegetables, and fruits are the main sources. Many “whole grain” products have less fiber than you’d expect — checking %DV beats trusting the marketing.

    Vitamin D (Daily Value 20mcg), calcium (1,300mg), iron (18mg), and potassium (4,700mg) all support specific health outcomes — bone health, blood, blood pressure regulation. Most people are short on at least one of these, and most don’t realize it. The label tells you which foods are meaningfully contributing.

    A 15-Second Label-Reading Routine

    Here’s how to combine everything above into a quick scan you can run on any package in the grocery store.

    Step What to Check Quick Rule
    1 Serving size and servings per container Multiply all other numbers by what you’ll actually eat
    2 Calories Useful for portion comparison; not the whole story
    3 %DV for sodium and added sugars ≤5% low (good for these); ≥20% high (limit)
    4 %DV for saturated fat ≤5% low; ≥20% high (limit)
    5 %DV for fiber, vitamin D, calcium, iron, potassium ≥20% high (good — get more of these)
    6 Ingredients list (separate from Nutrition Facts) Ingredients are listed by weight, highest first

    The Ingredients List Is Half the Story

    The Nutrition Facts label tells you how much of various nutrients are in the product. The ingredients list tells you what’s actually in it. Both matter, and the ingredients list is often where the real story lives.

    Ingredients are listed in descending order by weight, meaning the first ingredient is the most abundant by weight in the product. A bread that lists “whole wheat flour” first is mostly whole wheat. A bread that lists “enriched wheat flour” first and “whole wheat flour” fourth, after sugar, is mostly refined flour with some whole wheat sprinkled in. Both might say “whole wheat” on the front of the package.

    A few specific ingredient-list patterns worth noticing:

    Multiple types of added sugar disguising the total. A product might contain sugar, corn syrup, honey, dextrose, and maltose — each in small enough amounts that none is the first ingredient, but the combined sugar content is the largest. Splitting sugar into multiple forms is a common labeling tactic. Reading them as a single category gives a more accurate picture.

    The “first ingredient water” pattern. Many sauces, soups, and broths list water first, which is fine. Some products list water first to mask that the actual food content is minimal — for example, a “chicken broth” where chicken is the 8th ingredient.

    Allergens. Major allergens (milk, eggs, fish, shellfish, tree nuts, peanuts, wheat, soybeans, sesame) are required by U.S. law to be clearly identified, typically in a “Contains:” statement at the end of the ingredients list. If you have an allergy, the ingredients list and the contains statement together are the authoritative source.

    Front-of-Package Claims: Mostly Marketing

    The front of the package is the manufacturer’s marketing space. The Nutrition Facts label on the back or side is FDA-regulated. When the two seem to contradict, the back label is reality.

    Some front-of-package claims have specific FDA definitions:

    “Low fat” means 3g or less of fat per serving. “Low sodium” means 140mg or less per serving. “Reduced sodium” means at least 25% less sodium than the regular version of the product — but the regular version might still be high sodium, so “reduced” doesn’t necessarily mean low. “Light” can mean different things — usually one-third fewer calories or 50% less fat than the reference product. “Good source of fiber” means 10–19% DV per serving; “high in fiber” means 20% DV or more.

    Other claims have no formal FDA definition:

    “Natural” has no formal definition for most foods. It often means very little. “Wholesome,” “clean,” “premium,” and similar adjectives are marketing language with no nutritional meaning. “Made with whole grain” doesn’t mean the product is primarily whole grain — sometimes a single whole grain is added in small quantity. “No added sugar” doesn’t mean low sugar; the product could be naturally high in sugar (think 100% fruit juice). “Multigrain” just means multiple grains, all of which might still be refined.

    The FDA has updated rules for the specific claim “healthy” — products using this term must meet specific nutrient criteria including limits on saturated fat, sodium, and added sugars, plus inclusion of certain food groups. This is one of the few front-of-package claims with strict regulatory definition.

    The general rule: trust the back label. Look at the front label for the basic identity of the product (cereal, yogurt, soup) and ignore the adjectives.

    Things to Watch For

    Trick serving sizes. A “single-serve” muffin labeled as 2 servings, a “personal” pizza labeled as 3, a 20-ounce bottle of soda labeled as 2.5 servings — all techniques to make calorie and sodium numbers look smaller than the realistic portion. The FDA has tightened serving sizes since 2016, but the trick still appears on many products.

    Dual-column labels. For products that are larger than a single serving but might be consumed in one sitting, the FDA now requires “dual-column” labels showing both per-serving and per-package amounts. A bag of pretzels with 3 servings will have one column for one serving and another for the whole bag. This is useful and worth using when available.

    Vague organic and “non-GMO” claims. “Organic” has specific USDA certification meaning. “Non-GMO Project Verified” is a separate third-party certification. Both are regulated and meaningful if certified. The terms used loosely without certification on packaging mean little.

    Health-halo packaging. Packages with green colors, leaf imagery, or words like “natural” and “wellness” trigger automatic assumptions that the product is healthier. The packaging is designed to do this. The Nutrition Facts label tells you whether those assumptions are accurate. Often they’re not.

    “As prepared” vs. “as packaged” labels. Some products label “as prepared” — including the milk, butter, or oil you add. The numbers may look fine until you remember the package alone doesn’t get you there. Check whether the label is for the dry mix or for the cooked version.

    How to Compare Two Similar Products

    One of the highest-leverage uses of the Nutrition Facts label is comparing two similar products on the same shelf — two brands of pasta sauce, two cereals, two yogurts. The label converts the comparison into a 10-second exercise instead of guesswork.

    A practical protocol:

    Check serving sizes match. If brand A’s serving is 1 cup and brand B’s serving is 2/3 cup, you can’t compare numbers directly. Either mentally adjust the smaller one upward, or pick the brand where the serving size matches what you’ll actually eat.

    Compare the %DV for sodium and added sugars side by side. One pasta sauce might show 18% DV sodium; another shows 32%. Same volume, very different cardiovascular load over time. One cereal might show 14% added sugars per serving; another shows 28%. The numbers make the choice obvious.

    For each “get more of” nutrient, pick the higher %DV. If you’re choosing between two breads, the one with 14% DV fiber is a meaningfully better choice than the one with 6%, even if the calorie counts are nearly identical.

    If everything else is close, check the ingredients list. Two yogurts with similar nutrition profiles might differ dramatically in their ingredient lists — one might be milk and live cultures, the other might be a long list of sweeteners, stabilizers, and flavorings. Same %DVs, different products.

    After a few months of doing this, you’ll have implicit “favorite versions” of staple items in each category — a default pasta sauce, a default bread, a default yogurt — and the comparison only needs to happen when you’re trying something new.

    Common Mistakes to Avoid

    Skipping serving size and reading everything as “per package.” The single most common label-reading mistake. Multiplies your perceived nutrition by 2x, 3x, or more.

    Trusting front-of-package claims without checking the back. “Low fat” might be true while sodium and added sugar are sky-high. “Made with real fruit” might mean a trace of fruit puree in a sugar-heavy product. The back label is the truth.

    Obsessing over total sugars instead of added sugars. Total sugars in plain yogurt, milk, or fruit is mostly natural sugar — not the same nutritional concern as the added sugars in soda. Looking at added sugars %DV is far more useful than total sugars in grams.

    Ignoring sodium because it’s “not on your radar.” Sodium is the nutrient most Americans overconsume without realizing. The CDC’s guidance on the Nutrition Facts Label and your health notes the recommended daily limit for sodium is 2,300 milligrams for ages 14 and older — and most sodium comes from processed and restaurant foods, not from the salt shaker.

    Comparing dissimilar serving sizes. When comparing two products, check the serving sizes are equal first. One yogurt might be labeled per 6oz and another per 4oz — direct comparison of calories or sugar grams between them is misleading without adjustment.

    Letting label-reading become obsessive. Reading labels is a useful habit. Scanning every single product down to the gram, for every meal, becomes its own problem. Use the label to inform broad choices and to flag obvious red items — not to track every microgram. The point is making generally good decisions, not perfection.

    The Back Label Tells the Truth

    The whole point of the Nutrition Facts label is that it gives you the actual facts about what’s in a product, regardless of what the marketing on the front of the package says. The FDA designed it specifically so you don’t need to be a nutritionist to evaluate food intelligently — serving size at the top, calories bolded, %DV column on the right, 5%/20% as the rule, and a clearly distinguished section for nutrients to get less of versus nutrients to get more of.

    Most of the value comes from a handful of habits: always check the serving size first, use %DV to compare products quickly, watch sodium and added sugars in particular, look for high fiber and other under-consumed nutrients, and don’t trust front-of-package adjectives. After a few weeks of practice, this becomes a 10-second glance per item, and over time, the food in your cart starts looking measurably different from what would have been there before.

    No app required, no subscription needed, no nutrition degree necessary. The information is already on every package in the store, free, in your own pocket the next time you go shopping.

    This article is for general informational and educational purposes only and does not constitute medical or nutritional advice. Specific dietary needs vary by individual; consult a qualified healthcare provider or registered dietitian for guidance tailored to your situation.


  • Practical Tips for Better Sleep Without Buying Anything

    Practical Tips for Better Sleep Without Buying Anything

    The sleep industry has convinced an enormous number of people that better sleep requires spending money. A $2,000 smart mattress. A $300 sleep tracker ring. A $90/month subscription to a meditation app. Magnesium gummies, lavender pillow sprays, weighted blankets, blue-light glasses, and several supplements taking up cabinet space. Almost none of this is necessary. According to the Centers for Disease Control and Prevention’s official sleep guidance, the habits that most reliably improve sleep are free: going to bed and getting up at the same time every day, keeping the bedroom quiet, relaxing, and at a cool temperature, turning off electronic devices at least 30 minutes before bedtime, avoiding large meals and alcohol before bedtime, and avoiding caffeine in the afternoon or evening. This guide is about getting those basics right — and a few less-obvious adjustments that don’t show up on the marketing pages — so you sleep better without spending a dollar.

    A quick framing note. Bad sleep can sometimes be caused by an actual medical condition — sleep apnea, restless legs, severe insomnia, anxiety disorders, thyroid problems. If you’ve genuinely tried the basics and still sleep poorly for weeks at a time, that’s a doctor conversation, not a blog-article one. This guide is for the much larger group of people whose sleep is mediocre because of habits and environment, not because of medical issues.

    The Single Most Important Habit

    If you do nothing else in this article, do this: pick a wake time, and use it every day, including weekends. Your body’s circadian rhythm — the internal clock controlling sleep hormones, temperature, energy, and alertness — depends on consistent signals. The National Heart, Lung, and Blood Institute’s explanation of the sleep-wake cycle emphasizes that your central circadian clock takes its cues from the environment, especially light, darkness, eating, and physical activity. Random wake times confuse this system. Consistent ones let it stabilize.

    This sounds easy and isn’t. The hardest part is the weekend. Sleeping until noon on Saturday after waking at 7 a.m. all week creates what sleep researchers call “social jet lag” — your body experiences the same disruption as flying across several time zones. By Sunday night you can’t fall asleep, by Monday morning you can’t wake up, and the week starts in a hole. Aim to keep weekend wake times within about an hour of weekday wake times. You can still sleep slightly longer, but try not to shift the clock dramatically.

    Counterintuitively, consistent wake times matter more than consistent bedtimes. Bedtime tends to drift naturally based on your day; wake time is what you control with an alarm. Anchor the wake time first. The bedtime will follow if you’re tired enough.

    Light Is the Strongest Signal

    According to the NHLBI’s treatment recommendations for circadian rhythm disorders, light is the strongest signal in the environment for resetting your sleep-wake cycle. Most people need more sunlight during the day and less artificial light at night. Both halves of that sentence matter.

    Get bright light in the morning. Within 30 minutes of waking, expose yourself to bright light — ideally sunlight. Even on overcast days, outdoor light is many times brighter than indoor light, and that morning brightness is the single strongest signal you can give your body that it’s time to be awake. Two minutes outside while drinking coffee, a walk around the block, sitting by a window — any of these works. People who live in dark winter climates or work indoors all day are at higher risk of circadian drift; for them, a few extra minutes of intentional light exposure in the morning is the most cost-free intervention available.

    Dim the lights at night. The reverse principle holds in the evening. Bright overhead lights, especially with cool/blue spectrum bulbs, suppress melatonin production and tell your body it’s still daytime. An hour or two before bed, switch off overhead lights and use only warmer, dimmer sources — a single lamp on a low setting, candles, or the dimmest mode of nearby lights. Most modern phones, tablets, and computers have a “night mode” or “night shift” setting that reduces blue light automatically after sunset; enable it for free.

    Make the bedroom truly dark. Streetlights through curtains, the LED on a smoke detector, a charging laptop’s status light — small bright points in an otherwise dark room can subtly disrupt sleep. If you can’t afford blackout curtains, even a folded towel jammed over the curtain rod, or tape over an indicator LED, blocks light at zero cost. You’re not aiming for perfection. You’re aiming for “darker than it was.”

    Cool, Quiet, and Boring

    The ideal bedroom is cool, quiet, dark, and used for almost nothing except sleep. The CDC specifically recommends keeping your bedroom quiet, relaxing, and at a cool temperature, plus turning off electronic devices at least 30 minutes before bedtime. Most sleep researchers recommend a bedroom temperature in the range of about 60–68°F (about 15–20°C); body temperature naturally drops during sleep, and a cool room supports that drop.

    If your bedroom runs hot, you have free options before you start buying things. Crack a window. Use a thinner blanket. Take a warm (not hot) shower an hour before bed — counterintuitively, this helps you cool down faster afterward as blood vessels in your skin dilate. Sleep in lighter clothing, or none at all if you prefer. Run the bedroom fan you already own. None of this requires new purchases.

    For noise, the cheapest white-noise generator is a fan you already own. For free apps and websites, search “white noise” or “brown noise” on any device — countless free options exist. Earplugs cost a few dollars at any pharmacy if you genuinely need silence and live somewhere noisy. None of this requires a $200 sound machine.

    Finally — and this matters more than people think — keep your bedroom for sleep. If you also work, eat, watch shows, and scroll on your phone in bed, your brain stops associating the bedroom with sleep. Over time, you may find it harder to fall asleep in the place where you’ve spent the most awake time. Working from another room or even a different chair, and only using the bed for sleep and intimacy, gradually re-trains the association. This costs nothing.

    A Quick Reference Table

    Habit Effort Expected Benefit
    Consistent wake time An alarm Stabilizes circadian rhythm; the single highest-leverage habit
    Morning light within 30 min 2–10 minutes outside Stronger wake signal; easier sleep onset that night
    No caffeine after early afternoon Schedule shift Less fragmented sleep; deeper rest
    Dim lights an hour before bed A switch Earlier melatonin release; quicker sleep onset
    Phone out of bedroom 5 ft of distance Removes pre-sleep scrolling and nighttime wake-checking
    Cool bedroom (60–68°F) Thermostat adjust Supports natural temperature drop during sleep
    No alcohol within 3 hours Timing shift Better deep sleep; fewer 3 a.m. wake-ups

    Caffeine: It Lasts Longer Than You Think

    Caffeine has a half-life of roughly 5–6 hours for most adults — meaning half of the caffeine in your 3 p.m. coffee is still active in your system at 9 p.m. For slow metabolizers (a meaningful share of the population due to genetic variants), the half-life can stretch to 8+ hours. This is why people who insist they “can drink coffee right before bed” often still have measurably worse sleep architecture even when they fall asleep fine — the caffeine is interfering with deep sleep, not with sleep onset.

    The CDC’s own guidance recommends avoiding caffeine in the afternoon or evening. The practical rule that holds up for most adults: have your last caffeinated drink before 2 p.m. If you currently drink coffee at 4 or 5 p.m., shift it earlier and see what happens. Most people are surprised at how much their sleep improves.

    Worth noting: caffeine isn’t just in coffee. Black tea, green tea, matcha, many sodas, energy drinks, pre-workout supplements, some chocolate, and certain over-the-counter medications all contain caffeine. If you’ve cut off coffee at 2 p.m. and still aren’t sleeping well, check whether something else in your afternoon routine is the actual culprit.

    Alcohol Is Not a Sleep Aid

    A drink or two in the evening makes most people drowsy. This feels like a sleep aid. It isn’t. Alcohol initially promotes sleep onset, but as your body metabolizes it through the night, it fragments sleep, suppresses REM, and causes early-morning awakenings — the classic 3 a.m. wake-up that won’t let you fall back asleep. The CDC explicitly recommends avoiding alcohol before bedtime, and the underlying reason is well-documented in sleep research.

    If you drink, try to finish your last drink at least three hours before bed. Better yet, experiment with a few alcohol-free weeks and notice what happens to your sleep quality. Many people who haven’t slept well in years discover their drinking pattern is the main cause once they try a break.

    This isn’t a moral judgment. Plenty of people drink moderately and sleep fine. But if you’re struggling with sleep and you’re also drinking in the evenings, alcohol is one of the highest-probability suspects — and removing it costs nothing.

    A Pre-Sleep Wind-Down Routine

    Sleep doesn’t happen on demand. Your nervous system needs a transition window between the day’s stimulation and sleep. CDC and NIOSH’s guidance on preparing for sleep recommends following a relaxing routine before bedtime to help your body make the transition from being awake to sleeping — keeping light levels low one to two hours before bedtime and using calming activities like washing your face, brushing your teeth, and changing into sleep clothes as transition cues.

    A workable wind-down doesn’t have to be elaborate. Forty-five minutes is more than enough for most people. A simple example:

    A 45-Minute Wind-Down

    45 minutes before bed. Turn off bright overhead lights. Switch to one lamp. Stop drinking water (so you’re not waking up at 3 a.m. for the bathroom).

    30 minutes before bed. Put down the phone. Brush teeth, wash face, change into sleep clothes. Set out clothes for tomorrow.

    15 minutes before bed. Read a paper book, listen to calm music, do five minutes of slow breathing, or just sit quietly. Whatever lets your nervous system slow down.

    Lights out. Get into bed and turn off the light. Don’t lie awake scrolling.

    The point isn’t following any specific script. The point is having a repeatable sequence your body recognizes as “we’re shutting down now.” After a few weeks of consistent use, the routine itself becomes a sleep cue. You’ll start feeling drowsy partway through it.

    When You Can’t Fall Asleep

    Everyone occasionally has nights where sleep won’t come. The worst thing to do is lie in bed staring at the ceiling getting more frustrated. This trains your brain to associate the bed with anxiety rather than rest, and over weeks of bad nights, it can develop into actual insomnia.

    The standard advice from sleep researchers — sometimes called stimulus control — is: if you’ve been in bed for about 20 minutes and you’re not asleep, get out of bed. Go to another room, keep the lights low, and do something calm and slightly boring until you feel sleepy again. Reading a paper book, folding laundry, doing a jigsaw puzzle. Then go back to bed.

    Critically: don’t pick up the phone. Don’t turn on the TV. Don’t do anything stimulating or anything bright. The point is to remove yourself from the bed without triggering full wakefulness. Most people fall asleep faster the second time they try than they would have lying there frustrated.

    If you wake up in the middle of the night and can’t get back to sleep, the same approach applies. Don’t lie there checking the time. Don’t grab your phone. Get up briefly, do something calm and dim, return to bed.

    The Phone in Bed Problem

    Almost everything in this guide is easier if your phone isn’t in the bedroom at all. The phone-in-bed pattern causes three distinct problems, each of which costs you sleep.

    Scrolling delays sleep onset. The bright screen, the unpredictable content, and the way each swipe triggers a small dopamine response all push back the moment you actually fall asleep. People who scroll for “just a few minutes” before bed routinely lose 30–60 minutes of sleep without noticing.

    Nighttime wake-checking. If you wake up briefly at 3 a.m. and your phone is right there, you’ll check the time. Maybe a notification. Maybe just one quick look. The light, the cognitive engagement, and the rumination triggered by whatever you read all make it dramatically harder to fall back asleep. Twenty minutes later you’re wide awake and frustrated.

    Anxiety pile-up. Late-night phone use is the prime time for doomscrolling, work email checks, and social media spirals — all of which prime your nervous system for alertness rather than sleep. The content you encounter at 11 p.m. is the content your brain processes when it should be winding down.

    The fix is the most consequential free intervention available: charge your phone outside the bedroom. Buy a cheap alarm clock for $10 if needed, or use a smart speaker as an alarm. The phone is in another room overnight. This single change resolves all three problems at once, and people who try it for two weeks rarely go back.

    Daytime Habits That Affect Tonight’s Sleep

    Sleep is shaped by what you do during the day, not just what you do at night.

    Move your body. Even modest daily movement — a walk, some stretching, light exercise — meaningfully improves sleep quality. The benefits show up over weeks, not the first night, so don’t expect immediate results.

    Don’t nap late. Short naps (20–30 minutes) before about 2 p.m. don’t disrupt nighttime sleep for most people. Long naps, or naps later in the afternoon, can. If you nap and find you can’t fall asleep at night, shortening or eliminating the nap is the easiest test.

    Eat dinner with some time to spare. A heavy meal right before bed competes with sleep for your body’s resources — digestion ramps up just as you’re trying to wind down. Aim to finish dinner at least two hours before bed. The CDC’s guidance specifically recommends avoiding large meals before bedtime.

    Manage stress before it reaches the pillow. Anxiety that hits you at 11 p.m. is much harder to deal with than anxiety you addressed at 6 p.m. If you tend to lie in bed running through tomorrow’s worries, try writing them down for ten minutes earlier in the evening — a “brain dump” of everything on your mind, plus what you’ll do about it. People who do this consistently often find their nighttime mind chatter quiets significantly.

    Get outside, especially in winter. Even short outdoor exposure provides far more light than indoor lighting and helps regulate circadian rhythm. The 10-minute walk you don’t think you have time for is sometimes the most effective sleep intervention available.

    Things People Spend Money On That Usually Don’t Help

    Sleep trackers. Rings, watches, and mattress sensors that measure your sleep can be interesting for a couple of weeks. After that, for most people, they create more anxiety than information. Knowing you “slept poorly” before you’ve even gotten out of bed often turns into a self-fulfilling prophecy. A condition called orthosomnia — anxiety about sleep data — is now common enough that sleep specialists routinely tell patients to stop tracking. If you’re already sleeping reasonably well, a tracker won’t help. If you’re sleeping poorly, the data won’t fix the cause.

    Expensive supplements. The supplement industry sells billions of dollars of “sleep aids” with limited evidence of benefit for most people who aren’t deficient. Melatonin can help in specific cases (jet lag, shift work) but is often used incorrectly. Magnesium may help some people, mostly those who are deficient. Most other sleep supplements have weak evidence at best. If you have a specific deficiency, get tested by a doctor and supplement what’s actually low. Otherwise, you’re paying for hope.

    Expensive mattresses. A good mattress matters. A $4,000 mattress isn’t four times better than a $1,000 mattress, and a $1,000 mattress isn’t ten times better than a $300 one. Beyond a basic threshold of comfort and support, mattress price and sleep quality decouple sharply. If your current mattress is uncomfortable, replace it. If it’s fine, don’t.

    Blue-light blocking glasses. The evidence that they meaningfully improve sleep is thin. The same effect — reducing evening blue light exposure — can be achieved for free by using your devices’ built-in night modes and dimming the lights in your home.

    Sleep apps with subscriptions. Meditation and white-noise apps charge $50–$100 per year for content that’s available free on countless other apps and websites. If the app helps you, keep it. If you’re not using the paid features, cancel and use a free alternative.

    When to Talk to a Doctor

    The free approaches in this guide work for most people most of the time. But some sleep problems aren’t fixable with habit changes. According to NHLBI’s guidance on circadian rhythm disorders, disruptions in sleep patterns can be temporary and caused by habits, jobs, or travel — but when sleep-wake cycle disruption persistently interferes with daily activities, it may indicate a medical issue worth evaluating.

    Signs worth bringing to a doctor:

    Snoring loudly, gasping for air during sleep, or waking up unrefreshed despite seemingly adequate hours — possible sleep apnea, which is genuinely common and treatable. Persistent insomnia (more than three nights a week for more than three months). Excessive daytime sleepiness even after adequate sleep. Restless or uncomfortable sensations in the legs that disrupt sleep onset. Falling asleep involuntarily during the day.

    If any of those describe you, no amount of sleep hygiene will substitute for proper evaluation. Sleep studies, sometimes done at home, can identify underlying conditions; many are highly treatable, and continuing to suffer without proper diagnosis is the actual cost.

    The Basics Beat the Gadgets

    Most people with sleep problems spend money before they spend habits. They buy the supplement, the tracker, the mattress, and the app, while still going to bed at random times, scrolling in bed, drinking coffee at 4 p.m., and having a glass of wine after dinner. None of the purchases will outperform fixing those underlying habits.

    The good news is that the habit changes that matter are remarkably few. Wake at a consistent time. Get morning light. Avoid caffeine after early afternoon. Dim lights and put down screens an hour before bed. Keep the bedroom cool, dark, and quiet. Don’t use alcohol as a sleep aid. Get out of bed if you can’t sleep instead of stewing. Move your body during the day. That’s most of what works, and all of it is free.

    Start with one change this week — the consistent wake time is the highest-leverage place to begin. Add another change in two weeks. After a month or two of small consistent changes, most people sleep noticeably better without having bought a single thing.

    This article is for general informational and educational purposes only and does not constitute medical advice. Persistent sleep problems, suspected sleep disorders, or unexplained changes in sleep should be evaluated by a qualified healthcare provider.

  • How to Build a Morning Routine That Actually Sticks

    How to Build a Morning Routine That Actually Sticks

    Almost everyone has tried to start a morning routine. Almost everyone has also abandoned one by Wednesday of the second week. The reason isn’t lack of discipline — it’s that most morning routines collapse under their own weight. They demand getting up at 5 a.m., meditating, journaling, exercising, taking cold showers, drinking lemon water, reading, and visualizing success, all before breakfast. The first day feels productive. The fifth day feels exhausting. The tenth day doesn’t happen. This guide is about building the opposite kind of routine: a small, boring, repeatable one that survives bad days, busy weeks, travel, and life. According to the Centers for Disease Control and Prevention’s guidance on sleep habits, going to bed and getting up at the same time every day is one of the most effective things you can do for your sleep and daily energy — and consistency, not ambition, is what makes routines work.

    A quick framing note. This article isn’t about transforming you into a 5 a.m. productivity machine. It’s about building a few morning habits that you can actually do for years, that make your day measurably better, and that don’t require willpower you don’t have. The goal is sustainability, not optimization.

    Why Most Morning Routines Fail

    Before we build something that works, it helps to understand why the typical morning-routine advice doesn’t. There are a few recurring failure modes:

    Too much, too soon. The standard influencer morning routine packs 8–12 distinct activities into a 90-minute block. Each one is fine in isolation. Together, they require so much willpower that one bad night of sleep collapses the whole stack. A routine that requires perfect conditions to execute is not a routine — it’s a fantasy.

    Built on borrowed habits. The CEO who wakes at 4:30 a.m. and ice-baths has different work hours, different obligations, and different chronotype than you do. Copying their routine ignores the actual constraints of your life. The right morning routine matches your job, your sleep needs, your family, and your natural energy rhythm — not someone else’s Instagram.

    Built on outcomes instead of cues. “I want to exercise every morning” is a goal, not a habit. Habits attach to triggers. “After I pour my coffee, I’ll do five minutes of stretches” is a habit because the coffee is the trigger. Without a clear cue, the new behavior depends on remembering to do it — and you’ll forget.

    No protection against bad days. Real life includes sick kids, bad sleep, travel, deadlines, and weekends. A morning routine that only works under ideal conditions breaks the first time conditions aren’t ideal. The breaks are when habits die, because once you’ve broken a streak, restarting feels harder than starting fresh.

    Step 1: Start the Night Before

    Your morning routine actually begins the night before. The single most important variable in how your morning goes is how much sleep you got. According to CDC’s adult sleep statistics, the recommended amount of sleep for adults is at least 7 hours each day, and a large share of American adults consistently fall short. Trying to build a productive morning on six hours of sleep is fighting biology you can’t win against.

    The CDC’s guidance on better sleep habits, summarized from their official sleep page, is direct and worth following: go to bed and get up at the same time every day, keep your bedroom quiet, relaxing, and at a cool temperature, turn off electronic devices at least 30 minutes before bedtime, avoid large meals and alcohol before bedtime, and avoid caffeine in the afternoon or evening.

    Notice what’s missing from that list: heroic effort. None of those steps require special equipment, expensive supplements, or willpower. They’re operational changes — adjustments to environment and timing that compound into much better sleep without you doing anything dramatic.

    One small ritual worth adopting: spend the last five minutes of each day preparing for the next. Put your clothes out, fill the coffee maker, put your gym bag by the door, write down the three things you want to accomplish. This isn’t a productivity hack; it’s removing friction from tomorrow’s first decisions. The lower the friction at 6:30 a.m., the more likely your routine survives.

    Step 2: Pick a Consistent Wake Time (Not Necessarily Early)

    The popular advice is “wake up at 5 a.m.” The better advice is “wake up at the same time every day, and pick a time that lets you get at least 7 hours of sleep.” For most people that means going to bed between 10 and 11:30 p.m. and waking between 6 and 7:30 a.m. Whether you wake at 5:30 or 7:30 matters far less than whether you wake at the same time every day.

    Your body’s circadian rhythm — the internal clock controlling sleep, hormones, body temperature, and energy levels — depends on consistent signals. Random wake times confuse this system and make every morning feel like a small case of jet lag. Consistent wake times, even on weekends, allow the rhythm to stabilize so you wake up feeling rested rather than groggy.

    If you’re a natural night owl, fighting your chronotype to become an early riser is exhausting and rarely sustainable. Many of the most productive people in history were morning people; many others kept very late hours. The trait is largely genetic. Find a wake time that fits your biology, your obligations, and your sleep schedule — then defend it. Don’t pick 5 a.m. because Twitter said so.

    Step 3: Use Habit Stacking

    Habit stacking is the simplest, most reliable technique for adding new behaviors to your morning. The principle: attach the new habit to something you already do without thinking. The existing habit becomes the cue for the new one.

    Examples:

    “After I start the coffee, I’ll drink a glass of water.” The coffee maker beep is the cue. Hydration is the habit. You don’t have to remember anything — the coffee maker reminds you.

    “After I brush my teeth, I’ll do five minutes of stretching.” The morning bathroom routine is already automatic. Adding a five-minute stretch on the bathroom mat afterward attaches a new habit to an existing one.

    “After I sit down with my coffee, I’ll write three things I want to accomplish today.” Sitting with coffee is the cue. Writing is the habit. It takes 90 seconds.

    This works because you’re not asking willpower to maintain a brand-new habit. The brain already runs the existing habit on autopilot. The new habit gets carried along behind it. After a few weeks, the whole sequence becomes one unified routine.

    Step 4: Pick Two or Three Habits, Not Ten

    This is where most routines collapse. The temptation is to design an ambitious 60-minute morning that covers exercise, mindfulness, reading, journaling, planning, and breakfast prep. Don’t. Pick two or three habits, get them to stick over a few months, and only then consider adding more.

    A reasonable starter set for almost anyone:

    The Minimal Morning Routine

    1. Wake at the same time. The single highest-leverage habit. Anchors everything else.

    2. Get sunlight or bright light within 30 minutes. Open the curtains, step outside for two minutes, or sit by a window. This signals your circadian rhythm to wake up and helps you fall asleep on time tonight.

    3. Drink a glass of water. You’ve been hours without fluid. Five seconds of effort, meaningful payoff in clarity.

    4. Write three priorities for the day. One minute of effort that prevents the entire day from being reactive. Doesn’t matter if it’s on paper, a phone note, or a sticky note on your laptop.

    5. Move your body, even a little. A two-minute stretch, a short walk, ten pushups. Anything that breaks the “horizontal to seated to seated again” pattern.

    Total time: 10–15 minutes. None of these requires a 5 a.m. wake-up. None requires special equipment. None will be abandoned because you didn’t sleep well. They’re durable because they’re small.

    Step 5: Build in Movement (Even if You Hate Exercise)

    Some kind of movement in the morning, even brief, tends to be one of the most consistently rewarding morning habits. It doesn’t have to be a workout. According to the CDC’s physical activity guidelines for adults, adults need at least 150 minutes a week of moderate-intensity activity such as brisk walking, plus muscle-strengthening activities at least 2 days a week. That 150 minutes breaks down cleanly to about 22 minutes a day, or 30 minutes on five days. It does not require a gym membership, equipment, or a 6 a.m. spin class.

    A few ways to make morning movement painless:

    Walk first thing. Step outside for 10–15 minutes, even just around the block. You get morning sunlight (great for circadian rhythm), light cardio, and mental clarity all at once. Almost everyone underestimates how good a 15-minute walk feels.

    Do something tiny but daily. Five pushups, ten squats, a two-minute plank. The point isn’t fitness — it’s momentum. A small daily movement habit reliably grows into a real one. A grand workout plan rarely survives the first bad week.

    Stack movement with something you already do. Squats while the coffee brews. Stretches during the first podcast or audiobook of the morning. Pushups before getting in the shower.

    Don’t make morning movement your whole exercise plan. If you genuinely enjoy intense workouts at night, that’s fine. Morning movement is about waking up the body and creating consistency, not about fitting in your entire weekly training load before 8 a.m.

    Step 6: Delay the Phone

    The single behavior that destroys more morning routines than any other is checking the phone within the first two minutes of waking up. The moment you open email, Slack, social media, or the news, your morning becomes reactive. Other people’s priorities now run your attention. The carefully designed first hour you wanted is gone, replaced by random alerts, work crises, and the dopamine churn of feeds.

    The fix isn’t dramatic. You don’t need to delete apps or buy a flip phone. You just need to delay the phone by 30–60 minutes after waking. A few tactical ways to do this:

    Charge your phone outside the bedroom. If it’s not next to you, you can’t reach for it before you’re fully awake. Use a cheap alarm clock instead.

    Turn off lock-screen notifications. A locked phone showing nothing is dramatically less interesting than a locked phone showing 12 alerts. Most modern phones can deliver alerts silently and only when you open the app.

    Use the “Focus” or “Do Not Disturb” mode automatically. iOS Focus, Android Do Not Disturb, and similar features can be set to silence all but emergency calls between, say, 10 p.m. and 8 a.m. The phone becomes essentially passive during that window.

    The first 30–60 minutes phone-free isn’t about being disconnected. It’s about being the one who decides what enters your attention, rather than the one who reacts to whatever entered first.

    A Note on Caffeine Timing

    Coffee or tea is a near-universal part of most morning routines, and there’s nothing wrong with that. But timing matters more than people realize. A practical rule that holds up across most adults: delay caffeine for 60–90 minutes after waking, and stop drinking it by early afternoon.

    The first reason is that caffeine has a long half-life — typically 5 to 6 hours, meaning a 3 p.m. coffee is still meaningfully active at 9 p.m. The CDC’s sleep guidance specifically recommends avoiding caffeine in the afternoon or evening for exactly this reason: late caffeine fragments sleep even if you don’t feel it. The second reason is that drinking coffee the moment you wake up tends to mask natural morning alertness rather than enhance it; many people find that a slight delay leaves them feeling more awake later in the day, with less of an afternoon crash.

    This isn’t a hard rule. If your only viable morning is “coffee, immediately, before anything else,” keep doing what works. But if you find yourself dependent on increasing amounts of caffeine and still feeling tired by mid-afternoon, experimenting with a 60-minute delay and a 1 p.m. cutoff is the single most reliable adjustment.

    A Sample Routine That Actually Works

    Here’s what a realistic, sustainable morning could look like for someone with a typical 9-to-5 schedule:

    Time Activity Purpose
    6:45 a.m. Wake up (same time daily) Stabilize circadian rhythm
    6:46 Open curtains, drink a glass of water Light exposure + hydration
    6:50 Bathroom + brush teeth + 5 min stretching Habit-stacked movement
    7:00 Start coffee, sit with it Quiet transition time
    7:05 Write 3 priorities for the day Set intention before reactivity
    7:10 Breakfast + read a few pages Slow start; calm input
    7:30 Check phone (now and not before) Reactive mode begins on your terms

    Forty-five minutes. Nothing extreme. Nothing requiring extraordinary willpower. Almost anyone can do this for years. The point isn’t that this exact schedule is optimal — it’s that a routine of this scale is what survives.

    How to Survive the Inevitable Breaks

    Every routine breaks eventually. You’ll get sick, travel for work, have a bad week, or just sleep badly. The thing that separates people who maintain morning routines for years from people who abandon them by month two is how they handle the break.

    Don’t quit because you missed a day. One missed morning is just one missed morning. The mistake people make is treating it as evidence that the whole project has failed. It hasn’t. Pick up tomorrow.

    Have a “minimum viable” version. On a bad morning, what’s the smallest version of your routine you can still do? If your full routine is 45 minutes, your bad-day routine might be three minutes: drink water, open curtains, write one priority. The minimum version preserves the habit chain even when you don’t have time or energy for the full thing.

    Plan for travel. A travel version of your morning routine that fits hotel rooms, time zones, and weird schedules keeps the habit alive when you’re away from home. Doesn’t have to be elaborate — even just “wake at consistent time, drink water, stretch for two minutes” preserves continuity.

    Don’t try to “catch up.” If you’ve missed a week, restart tomorrow with the minimum version. Don’t try to do double the next day to compensate. That’s the all-or-nothing thinking that destroys most attempts at consistent habits.

    Common Mistakes to Avoid

    Trying to wake up an hour earlier than usual on day one. Your body resists this. Shift your wake time by 15 minutes per week, not an hour overnight, if you want to move it earlier. The slow approach actually works; the dramatic approach almost always fails within ten days.

    Building a routine that only works at home. If your morning routine depends on a specific coffee maker, a specific yoga mat, and a specific quiet room, it dies the first time you travel. Design something that can flex to different environments.

    Comparing yourself to other people’s mornings. Social media is full of curated, idealized morning routines designed to make you feel inadequate. Your goal isn’t to perform mornings. Your goal is to feel good and operate well by 9 a.m. If your routine accomplishes that, it’s working — regardless of whether it photographs nicely.

    Tracking everything with apps. Habit tracker apps are useful for the first month and a burden after that. Once a routine is automatic, tracking it becomes the new chore. Most people are better off with a simple paper checklist or no tracking at all once the habit is established.

    Adding new habits before the old ones are stable. If you’re still struggling to stick with your three current habits, adding a fourth makes it less likely that any of them will survive. Add new habits only after the current set is automatic — typically after a couple of months of consistency.

    Treating the routine as the goal. The routine is a means, not an end. The point isn’t to perfect your morning — it’s to have your morning consistently serve the rest of your day. If a habit isn’t actually making your day better, drop it, regardless of how good it looks on paper.

    A 30-Day Starter Plan

    If you want a concrete way to begin, here’s a 30-day plan that builds a stable morning routine without overwhelming you.

    Building It in Four Weeks

    Week 1. Pick one wake time. Use it every single day. Don’t change anything else. The single goal of this week is consistent wake time. Track only that.

    Week 2. Add two micro-habits: a glass of water and 30 seconds of light exposure within five minutes of waking. Continue the consistent wake time.

    Week 3. Add a five-minute movement block — stretches, a short walk, a few pushups. Whatever fits your space. Stack it with an existing morning behavior so you don’t have to remember it.

    Week 4. Add a 60-second “write three priorities” step before checking your phone. Don’t add anything else this month. At the end of week four, you have a stable five-habit morning routine.

    After 30 days, the habits will start feeling automatic. After 60–90 days, they’ll feel weird to skip. That’s when you can consider adding new elements — meditation, journaling, reading, exercise — one at a time, never more than one per month.

    Boring Routines Win

    The morning routines that change people’s lives aren’t the elaborate ones in magazine profiles. They’re the boring, sustainable, slightly small-feeling ones that someone has actually done for several years without missing a beat. Consistent wake time, water, light, movement, intention-setting, and a delayed phone. That’s it. Practiced for two years, that simple stack outperforms anyone’s three-week heroic experiment.

    The biggest mistake almost everyone makes is mistaking ambition for progress. A routine that asks for too much on day one collapses by week three, leaving you with nothing. A routine that asks for almost nothing on day one, and stays small for months, compounds into something genuinely transformative over years. The question to ask isn’t “what’s the optimal morning routine” — it’s “what’s the smallest morning routine I can actually do for the next two years.”

    Pick one habit this week. Just one. Add the next one in two weeks if the first one is sticking. In six months you’ll have a morning routine that beats anyone’s Instagram version, because you’ll still be doing yours.

    This article is for general informational and educational purposes only and does not constitute medical, psychological, or fitness advice. Sleep needs and exercise capacity vary; consult a qualified healthcare provider for guidance specific to your situation.