Baking Bread at Home: A Complete Beginner’s Guide
Four ingredients, five minutes of work, one ordinary pot — and the yeast kneads overnight while you sleep. The complete beginner’s path to a crackling bakery loaf: the two concepts you need, the foolproof first recipe in grams, and the troubleshooting table for every beginner failure.
The first time you pull a real loaf from your own oven — crackling as it cools, crust the color of mahogany, the whole kitchen smelling like a bakery — something quietly rearranges in your head about what home cooking can be. Bread has a reputation as the Everest of the home kitchen, an art of sourdough mystics and decade-long apprenticeships. The reputation is wrong. The single best entry point into bread — the no-knead method, popularized by baker Jim Lahey and perfected in thousands of home ovens — requires four ingredients, five minutes of actual work, and one ordinary pot. The yeast does the kneading, overnight, while you sleep.
This guide walks the complete beginner’s path: the science you actually need (two concepts, not twenty), the foolproof first loaf with every step explained, the troubleshooting table for when things go sideways, and the roadmap from your first crusty loaf to sourdough — for when the obsession arrives, as it reliably does. The recipes and ratios align with the baker-tested guidance at King Arthur Baking’s bread guide, the most trusted free resource in home baking, linked throughout for verification.
1.The Only Two Concepts You Need
Bread science is bottomless — professional bakers study it for years — but a beginner needs exactly two mental models.
Concept one: gluten is a net, and time can build it. Wheat flour contains proteins that, when wet and worked, link into an elastic web. That web traps the gas yeast produces, which is why bread rises and why its crumb has structure. Kneading builds the web mechanically — but so does time. Left overnight in a wet dough, the proteins organize themselves. That trade — time for labor — is the entire no-knead insight: twelve to eighteen hours of patience replaces ten minutes of kneading, and the result is indistinguishable.
Concept two: yeast is alive, and it has a comfort zone. Yeast eats sugars in the flour and breathes out the carbon dioxide that inflates the gluten net. It works fastest warm (24–27°C / 75–80°F is its happy room), slows in the cold (which is why the fridge is your scheduling tool), and dies around 60°C (140°F) — which is why “lukewarm” water, not hot, is the one rule you can’t fudge. Salt flavors the loaf and reins the yeast in; without it, dough overproofs and tastes flat. That’s the whole biology lesson. Everything in bread baking is these two concepts applied.
2.Equipment: The Four-Item List
Table 1 — What you need (and famously don’t)
| Item | Why | Cost |
|---|---|---|
| Kitchen scale | Bread is ratios; grams don’t lie the way cups do. The one non-negotiable tool | $12–20 |
| Heavy lidded pot (Dutch oven) | Traps the loaf’s own steam, replicating a baker’s steam-injected oven — the secret to crackling crust | $35+ (or an oven-safe pot with any lid) |
| One large bowl + a spatula | The entire “mixing station” | Owned already |
| Parchment paper | Transfers the slack dough into a screaming-hot pot without drama | $3 |
Not on the list: a stand mixer, a banneton, a lame, a baking stone, a proofing box. All are lovely upgrades on month three; none is required on day one. The scale deserves a sermon: bread recipes in cups fail because a cup of flour can weigh anywhere from 120 to 160 grams depending on how it’s scooped — a 30% error in the main ingredient. Grams end that lottery forever, which is why every recipe below is in grams.
3.The First Loaf: No-Knead, Step by Step
This is the loaf that has launched a million bakers — the ratio and method match the celebrated King Arthur no-knead crusty white bread, with every step explained for a first-timer.
Table 2 — The ingredients (one loaf)
| Ingredient | Grams | Baker’s % |
|---|---|---|
| Bread flour (or all-purpose) | 500 g (about 4 cups) | 100% |
| Water, lukewarm | 375 g (1⅝ cups) | 75% |
| Salt | 10 g (1¾ tsp) | 2% |
| Instant yeast | 2 g (½ tsp) | 0.4% |
Evening, five minutes: Whisk the dry ingredients in the big bowl, add the water, and stir with the spatula until no dry flour remains. The dough will look shaggy, sticky, and deeply unpromising — correct. Cover the bowl (a plate works) and walk away.
Overnight, zero minutes: Leave it at room temperature 12–18 hours. Time is now kneading your bread. By morning it will be doubled, bubbly, and dotted with air pockets — the gluten net, self-built.
Morning, ten minutes: Tip the dough onto a well-floured counter. Fold the edges into the center a few times — thirty seconds of folding, not kneading — flip it seam-side down into a ball, and rest it on a sheet of parchment for 30–60 minutes while the oven, with the lidded pot inside, preheats at 230°C (450°F) for a full 30 minutes. A hot pot is not a detail; it’s the crust.
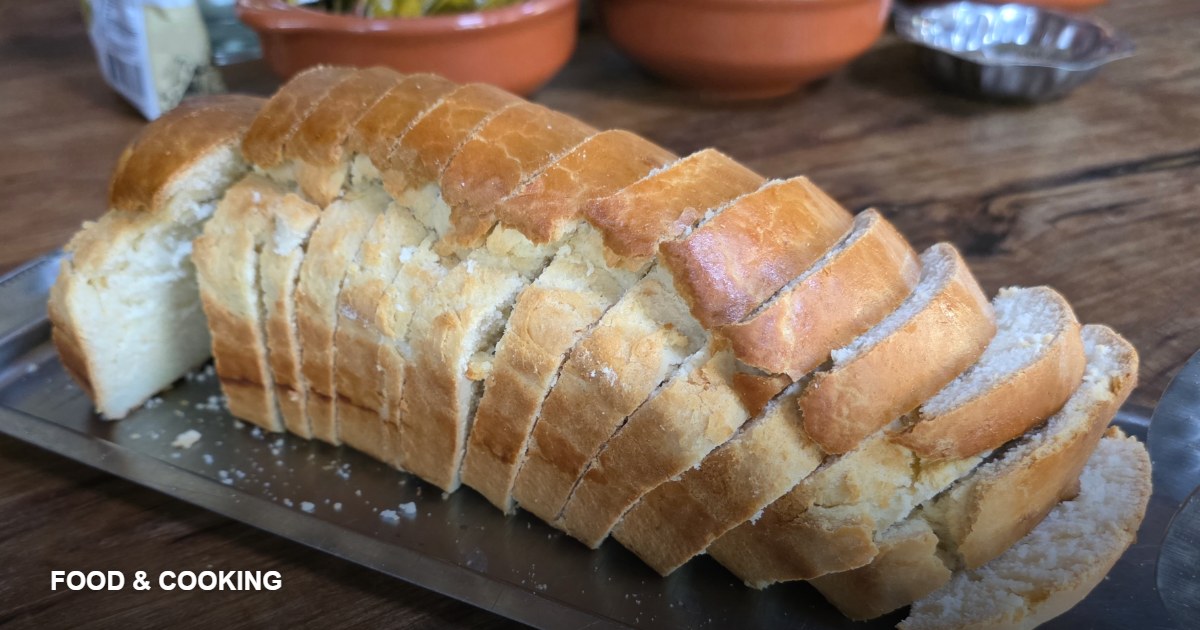
Bake: Lift the dough by the parchment corners, lower it into the hot pot, lid on, 30 minutes. Then lid off, 10–15 more, until the crust is deep mahogany — darker than feels safe. Pale bread is under-flavored bread; color is flavor. Cool on a rack at least an hour before cutting — the crumb is still setting, and the crackling sound it makes as it cools is the baker’s applause.
The Schedule Hack
The long rise is flexible: dough rises at room temperature for up to 18 hours, then waits in the fridge for up to 3 days, developing deeper flavor as it waits. Mix Sunday evening, bake any evening through Wednesday. Bread on your schedule, not the yeast’s.
4.Reading Your Dough: The Sensory Guide
The clock is a rough guide; the dough is the truth. Experienced bakers run on sensory cues, and they are learnable in your first three loaves:
Table 3 — What the dough is telling you
| Stage | Looks Like | Feels / Smells Like |
|---|---|---|
| Just mixed | Shaggy, sticky, rough | Smells of raw flour; tears easily |
| Mid-rise | Growing, surface smoothing | Mildly yeasty; springs back slowly when poked |
| Ready to shape | Doubled, domed, webbed with bubbles | Pleasantly beery; a poke fills in halfway |
| Over-proofed | Collapsed center, slack, spread out | Sharply alcoholic; poke leaves a crater — bake it anyway, it’ll still taste good |
| Ready to cut | Cooled to room temp, crust hardened | Crackling has stopped; crumb is set, not gummy |
These cues matter because kitchens vary more than recipes admit: a 20°C winter kitchen rises half as fast as a 27°C summer one. The dough-reading habit — poke, sniff, watch the bubbles — frees you from the tyranny of “exactly 14 hours” and is the invisible skill behind every confident baker you’ve ever watched.
5.Troubleshooting the First Five Loaves
Table 4 — Every beginner problem, diagnosed
| Symptom | Cause | Fix Next Time |
|---|---|---|
| Dense, flat loaf | Under-risen (cold kitchen, old yeast) or flour measured by cup | Check yeast freshness; give it more time; weigh the flour |
| Dough didn’t rise at all | Dead yeast (water too hot, or expired packet) | Lukewarm means bath-warm; test yeast in warm water with a pinch of sugar — it should foam in 10 minutes |
| Gummy, wet crumb | Cut too early, or under-baked | Full hour of cooling; darker crust next time; check internal temp hits 96–99°C (205–210°F) |
| Pale, soft crust | Oven or pot not hot enough; lid-off phase too short | Full 30-minute preheat; bake until genuinely dark |
| Loaf spread into a pancake | Dough over-proofed (rose too long in a warm kitchen) | Shorten the rise or move it to the fridge; the dough should jiggle, not slosh |
| Bland flavor | Not enough salt, too-short rise, or pale crust | Salt is 2% of flour weight, always; extend the rise; bake darker |
The meta-lesson of the table: nearly every failure is time, temperature, or measurement — the three variables you now control. Bread is famously forgiving of ugly technique and famously unforgiving of guessed quantities. Weigh, wait, and bake dark, and loaf two is already better than most supermarket bread.
6.Five Variations Once the First Loaf Lands
1. Whole wheat blend. Swap 100–150 g of the white flour for whole wheat — nuttier, heartier, and only slightly denser. Go further as you gain confidence; whole grains absorb more water, so add a splash.
2. Seeded harvest loaf. Fold a handful of mixed seeds (sunflower, flax, sesame) into the dough at mixing, and press more onto the surface before baking. The crunch-to-crumb contrast is superb.
3. Rosemary and olive oil. Two tablespoons of olive oil in the dough, chopped rosemary folded in, flaky salt on top. Dinner-party bread from the same five minutes of work.
4. Cinnamon-raisin. A tablespoon of sugar, a teaspoon of cinnamon, and a handful of raisins at mixing. Toast the slices; the kitchen smells like a memory.
Each variation follows the same method unchanged — same rise, same pot, same dark bake. Only the mix-ins change, which is precisely the point: master one dough, and a dozen breads become variations on a theme you already know.
5. The 50% fridge loaf. The deepest flavor variation requires no ingredients at all: after the overnight rise, hold the dough in the fridge for two to three days before baking. Slow, cold fermentation develops the complex, almost tangy notes that artisan bakeries charge for — free, from patience.
7.Beyond the Loaf: Three Second Projects
Once the basic loaf is routine — usually by loaf four or five — the same dough skills open three natural second acts, each teaching something new:
Focaccia is the confident encore: the same wet dough pressed into an oiled sheet pan, dimpled with fingertips, slicked with olive oil, and scattered with rosemary and salt. It teaches hydration handling without any shaping skill at all, and it is nearly impossible to serve without applause.
Pizza dough teaches the opposite lesson — restraint: a leaner, cooler-fermented dough stretched thin, topped sparingly, and baked at your oven’s absolute maximum. The beginner’s pizza revelation is that less topping and more heat beats the loaded, soggy middle every time.
Rolls and buns teach portioning and shaping: divide the dough, roll tight balls against the counter, proof close together so they rise into pull-apart squares. Same dough, same oven, dinner-party format. Master the loaf, the flatbread, and the bun, and you hold the complete foundation on which the entire craft of bread is built.
8.The Road to Sourdough (When the Obsession Arrives)
Every no-knead baker eventually looks at sourdough. The honest briefing: sourdough replaces packaged yeast with a wild culture — flour, water, and captured wild yeast, fed on a schedule — trading convenience for flavor depth and a small daily relationship with a jar. It’s a hobby as much as a recipe. The bridge steps that make the jump easy: first, master the no-knead loaf cold-retarded (variation five), which teaches you to read dough by feel rather than by clock; then maintain a simple starter (the King Arthur guide linked above covers building one from flour and water); then apply everything you already know — grams, the hot pot, the dark bake. The skills transfer completely. Sourdough is not a different craft; it’s the same craft with a living ingredient.
9.The Six Beginner Mistakes, Preempted
- Measuring flour in cups. The thirty-percent lottery. A scale costs less than the flour you’ll waste without one.
- Hot water on the yeast. Lukewarm, always — if it would scald a baby’s bath, it kills yeast.
- Under-preheating the pot. The steam-trapping hot pot is the crust engine. Thirty minutes, minimum, no exceptions.
- Cutting the loaf hot. The crumb is still cooking internally for an hour. The wait is the hardest step in this guide and the most worth it.
- Fearing a dark bake. Mahogany, not blonde. Color is the Maillard flavor your oven spent an hour building.
- Judging the dough by the clock alone. Kitchens vary; doughs tell the truth. Doubled, bubbly, jiggly is ready — whenever that happens.
10.Frequently Asked Questions
How much does a homemade loaf actually cost?
Roughly sixty to ninety cents in ingredients for the basic loaf — flour, salt, yeast, and tap water being famously cheap. Against a five-to-seven-dollar artisan loaf, bread baking pays for its Dutch oven within a couple of months, and pays for the scale within a couple of loaves.
My kitchen is cold — how do I manage the rise?
Give the dough a warm microclimate: the oven with just the light on, a spot atop the fridge, or the bowl set in a larger bowl of warm water, refreshed once. Cold doesn’t kill yeast, it slows it — so the alternative is simply more time, which the no-knead method happily forgives.
Can I double the recipe?
Yes, and you should once the first loaf succeeds — two loaves cost five extra minutes. Bake them in sequence (the pot reheats in ten minutes), and freeze the second loaf the day it’s baked: thawed and five minutes in a hot oven, it’s indistinguishable from fresh.
Can I bake without a Dutch oven?
Yes: any oven-safe pot with a lid works, and the fallback method — a baking sheet with a pan of hot water on the oven’s bottom rack for steam — produces a respectable crust. The pot is simply the most reliable steam trap; the steam is the actual requirement.
How long does homemade bread keep?
Two to three days at its best, cut-side down on the board or in a paper bag (plastic softens the crust). No preservatives means faster staling — which is why day-three bread becomes toast, croutons, and the best French toast of your life. Freeze sliced what you won’t finish; it toasts back to life perfectly.
Bread flour or all-purpose?
Either works; bread flour’s higher protein gives a slightly chewier, taller loaf. Start with what’s in the cupboard — the method matters far more than the margin between the two flours.
Is instant yeast different from active dry?
For this method, barely — instant yeast can go straight into the flour, while active dry traditionally wants ten minutes dissolved in the warm water first. Either bakes a fine loaf; just keep the water lukewarm for both and give active dry its head start.
Why did nobody tell me it was this easy?
Because the mystique is good for bakeries. Four ingredients, five minutes of work, an overnight wait, and a hot pot: the bread world has known since 2006 that this works, and your oven is about to prove it.
Sources & Further Reading
Method and ratios: King Arthur Baking’s bread guide and their no-knead crusty white bread recipe. Conversions and weights: King Arthur Baking’s ingredient weight chart. All links verified live at publication. Pair your fresh bread with the soups and braises from our one-pan dinner guide.
Bread teaches the best lesson in cooking: that time and temperature, honestly applied, outperform talent. Mix the dough tonight. Tomorrow evening, your kitchen smells like a bakery — and the baker is you. And when the second loaf comes out darker, taller, and louder-crackling than the first — it will — you’ll understand why so many people describe their first homemade bread not as a recipe they followed, but as the moment cooking became a craft they owned.