Category: Home & Lifestyle

  • Easy Ways to Lower Your Electricity Bill at Home

    Easy Ways to Lower Your Electricity Bill at Home

    Most electricity bills are higher than they need to be — not because the rates are unfair, but because the typical home wastes a meaningful percentage of the energy it pays for. According to ENERGY STAR’s low-cost tips for saving energy at home, almost half the average household’s annual energy bill — more than $900 a year — goes to heating and cooling alone. Another significant share goes to water heating (about 18%), and roughly 10% to consumer electronics that often run when nobody’s using them. The good news: a meaningful share of that is recoverable with small, free or very cheap changes. No solar panels required, no $4,000 heat pump, no whole-house retrofit. Just a handful of habit and equipment adjustments that, together, can cut a typical household’s bill noticeably. This guide is the practical version — what actually works, what’s a marketing gimmick, and what order to do things in.

    A quick framing note. Energy savings are highly variable based on climate, home age, household size, electricity rates, and current habits. The dollar figures quoted in this article come from the Department of Energy (DOE) and ENERGY STAR’s published averages — meaning they’re rough averages for a U.S. household. Your savings could be more or less. The point is the direction, not the exact dollar amount.

    Step Zero: Know Where Your Bill Is Actually Going

    Before changing anything, take five minutes to look at where your electricity is being used. According to the Department of Energy’s guidance on reducing electricity use, the national average electricity consumption is about 1,000 kWh per month — if your bill shows significantly more than that, there are likely larger savings available.

    For a typical home, electricity use breaks down roughly like this:

    Category Share of Bill Highest-Leverage Fix
    Heating & cooling ~45–50% Thermostat adjustments + air sealing
    Water heating ~18% Lower water heater temp + cold-water laundry
    Appliances ~15% Full loads only; clean dryer lint filter
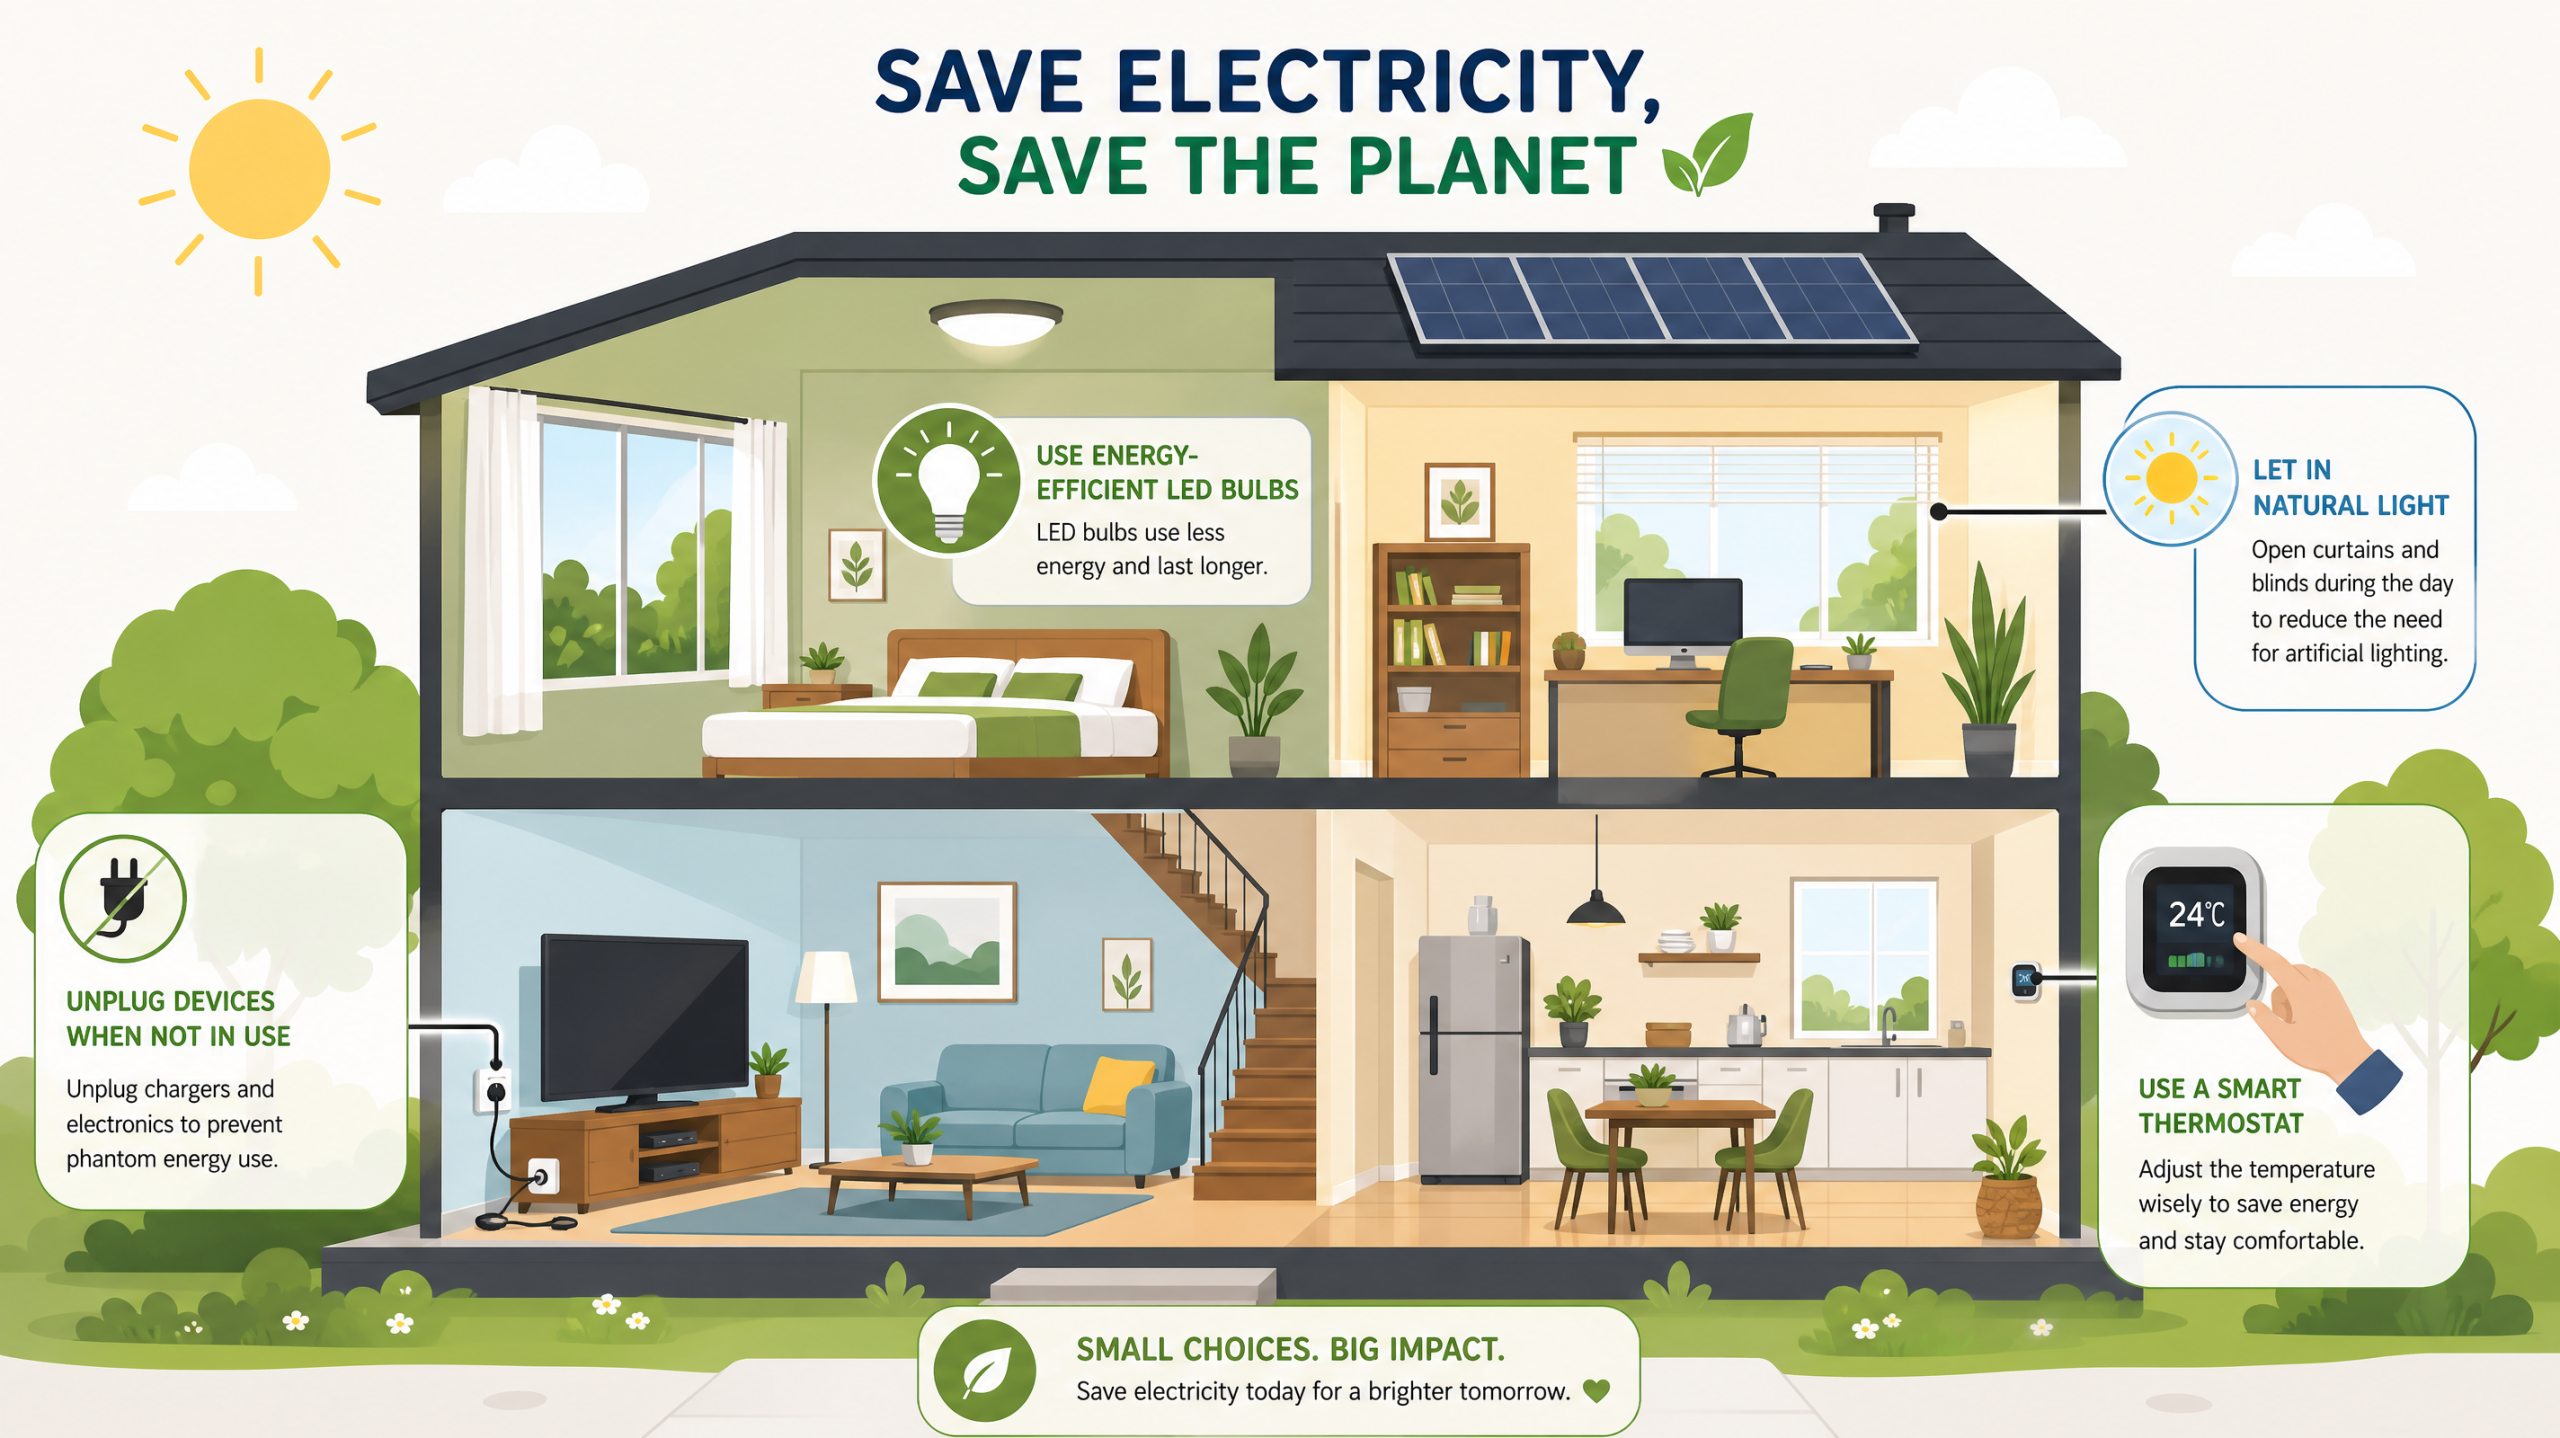
    Electronics ~10% Power strips to eliminate vampire loads
    Lighting ~5–10% Replace remaining incandescent bulbs with LEDs

    Notice where the leverage is: heating and cooling alone is roughly half the bill. Saving 10% on lighting saves you maybe $5 a month. Saving 10% on heating/cooling saves you $40+. Prioritize accordingly. The rest of this guide is ordered by how much savings each change typically produces.

    Heating and Cooling: The Big Lever

    According to ENERGY STAR, almost half the annual energy bill for the average American household — over $900 a year — goes to heating and cooling. Even modest improvements here outweigh aggressive changes anywhere else.

    Adjust the Thermostat

    The single highest-leverage change in most homes is using less heating and cooling. The Department of Energy’s general guidance: the smaller the difference between indoor and outdoor temperature, the lower your bill. Every degree closer to outdoor temperature meaningfully reduces costs.

    Practical targets most households can adapt to:

    Winter: 68°F when you’re home and active, lower when sleeping or away.

    Summer: 78°F when home, higher when away.

    These aren’t strict numbers — comfort matters and varies by person. But the typical thermostat is set 3–5 degrees more aggressively than necessary, and adjusting toward these targets, even partway, captures real savings. A degree or two of conscious tolerance, especially when you’re not home, is worth dozens of dollars a month.

    Get a Programmable or Smart Thermostat

    According to ENERGY STAR, an ENERGY STAR certified smart thermostat can reduce heating and cooling bills by more than 8% — about $50 a year on average for the typical household. For homes that are unoccupied much of the day, the savings can reach about $100 a year. Even a non-smart programmable thermostat captures most of this savings if you actually program it.

    The reason: heating or cooling an empty house wastes money continuously. A thermostat that automatically sets back when you’re at work and overnight while you’re sleeping, and brings the house back to comfort just before you wake or return, gives you the comfortable temperature you actually use without paying for the hours you don’t.

    Seal Air Leaks

    Air leaks are the silent budget killer in older homes. The DOE notes that up to a third of a typical home’s heat loss occurs through windows and doors, and gaps around outlets, baseboards, attic hatches, and plumbing penetrations add to it.

    The two cheapest fixes that produce real savings:

    Caulking gaps and cracks. A tube of caulk costs a few dollars. Sealing visible gaps around window frames, baseboards, and outlets reduces leakage substantially. The DOE estimates caulking leaks can save an average household 10–20% on heating and cooling bills.

    Weather-stripping doors and windows. Self-adhesive foam or rubber weather-stripping costs $10–20 per door and seals the gaps around the frame. The DOE estimates this can save an additional 5–10% on heating and cooling bills.

    If you’re not sure where leaks are: on a windy or cold day, slowly move a lit incense stick or a feather around door and window frames, outlets, and baseboards. Air movement reveals the leak. Renters can usually do basic weather-stripping without lease issues, and the materials peel off cleanly when moving out.

    Use Window Coverings Strategically

    From the DOE’s spring and summer energy-saving tips: window coverings prevent heat gain through windows during warm weather. In summer, close blinds and curtains on sun-facing windows during the hottest part of the day. In winter, do the opposite — open them during daylight hours to capture free solar heat, and close them at night to slow heat loss.

    This is genuinely free. The blinds and curtains you already own are an underused energy tool when used with intention.

    Maintain Your HVAC

    A dirty air filter forces your heating or cooling system to work harder, consuming more electricity for the same comfort level. Replace HVAC filters every 1–3 months depending on use. Clean condenser coils on air conditioners. Have the system serviced annually. None of this is dramatic, but a poorly maintained HVAC system can use 15% or more energy than a maintained one.

    Water Heating: The Underrated Cost

    Water heating typically consumes about 18% of a home’s energy. According to the DOE, the Consumer Product Safety Commission recommends setting water heaters at no more than 120°F to prevent scalding — and many heaters come from the factory set to 140°F, far hotter than necessary. Lowering it to 120°F is free, takes less than five minutes, and produces measurable savings.

    How to do it: Find the thermostat dial on your water heater (gas or electric). Mark the current position with a pencil. Lower it to 120°F or the equivalent setting. Wait 24 hours and check that your hot water is still comfortable at the tap.

    Wash laundry with cold water. ENERGY STAR notes that hot water heating accounts for about 90% of the energy your washing machine uses to wash clothes — only 10% goes to the actual motor. Modern detergents are formulated for cold water and clean effectively for most loads. Switching to cold water laundry alone can save more than $40 a year for many households.

    Wash full loads. ENERGY STAR estimates that washing full loads can save more than 3,400 gallons of water per year compared with partial loads — and the energy required to heat that water.

    Shorter showers + low-flow showerhead. Replacing an old showerhead with a 2.5 gallon-per-minute low-flow model can save up to $145 each year on electricity, per ENERGY STAR. A 10-minute shower with a low-flow head uses about 25 gallons; a typical bath uses 30+. Showers win, and shorter showers win more.

    Dishwasher: full loads, air dry. Skip the heat-dry cycle. Run the dishwasher only when it’s full. Don’t pre-rinse — modern dishwashers handle scraped (not rinsed) dishes effectively, per ENERGY STAR’s specific guidance.

    Vampire Loads: Free Money Most People Leave on the Table

    “Vampire load” or “phantom load” is the electricity electronics use when they’re turned off but still plugged in. According to ENERGY STAR’s analysis citing Consumer Technology Association data, 3.4 billion consumer electronic devices consumed about 143 TWh of electricity in 2017 — representing about 10% of residential sector electricity consumption. A meaningful chunk of that is standby power consumption.

    Common vampires: TVs in standby, set-top boxes (often huge culprits), gaming consoles in instant-on mode, sound bars, computer monitors, phone chargers left plugged in without phones, microwave clocks, coffee makers with displays.

    The fix is cheap and easy. ENERGY STAR specifically recommends using a power strip as a central “turn off” point. Plug your entertainment center (TV, set-top box, console, sound bar, etc.) into one power strip. Plug your home office (computer, monitor, printer) into another. Switch them off at the end of the day. Standby consumption goes to zero.

    An “advanced power strip” or “smart power strip” automates this — it senses when the main device is off and cuts power to peripherals. Costs about $20 and pays for itself within months in most households. The DOE’s guidance on reducing electricity costs explicitly recommends advanced power strips to reduce vampire loads.

    Check your 3 a.m. consumption. If your utility has a smart meter and online dashboard, look at your hourly use overnight when ideally nothing should be running but the fridge. If 3 a.m. consumption is significant, you have vampire loads worth hunting down. The DOE specifically recommends this diagnostic technique.

    Lighting: Small Savings, Almost Free to Capture

    If your home still has incandescent or halogen bulbs anywhere, replace them. According to ENERGY STAR, replacing your five most frequently used light fixtures or the bulbs in them with ENERGY STAR certified LED lights can save about $40 a year in energy costs. ENERGY STAR certified LED bulbs use up to 90% less energy and last 15 times longer than standard bulbs.

    The math is unusually favorable. LED bulbs cost a few dollars each, last 10–25 years in typical use, and use a fraction of the electricity of older bulbs. Even at modest hours of daily use, an LED pays for itself in well under a year.

    Beyond the bulbs themselves:

    Turn off lights when leaving a room. Free.

    Use natural light during the day. Free.

    Outdoor lights on a timer or motion sensor. Outdoor lights left on all night are a steady drain. Timers and motion sensors keep them functional only when needed.

    Lighting is a smaller share of the bill than heating/cooling, but the fixes are nearly free and produce immediate, measurable reductions in consumption.

    Kitchen and Laundry Habits That Add Up

    Refrigerator: Keep coils dust-free (vacuum behind/under the fridge once a year); don’t pack it so full that air can’t circulate; check the door seal closes tightly. If your fridge is more than 15 years old, an ENERGY STAR replacement can cut its specific energy use significantly — but only consider replacement if the old one is genuinely on its way out.

    Microwave instead of oven for small heating jobs. A microwave uses far less energy than a full-size oven for warming small portions.

    Clothes dryer: Clean the lint filter every load — not just for safety but for efficiency. A clogged filter makes the dryer work much harder. Don’t over-dry loads; many dryers have moisture sensors that should be used. Drying multiple loads back-to-back keeps the drum hot, reducing the energy to reheat between loads.

    Air-dry when practical. A drying rack inside (or a clothesline outside, weather permitting) bypasses the dryer entirely. Not realistic for every load, but useful for towels, sheets, and clothes that don’t need fluffing.

    Time-of-Use Rates: If Your Utility Offers Them

    Many utilities now offer time-of-use (TOU) rate plans, where electricity costs more during peak hours (typically late afternoon/early evening) and less during off-peak hours (nights and weekends). The DOE notes that customers who can shift power use to off-peak times can save meaningfully — for example, running the dishwasher late in the evening instead of right after dinner.

    Whether TOU rates make sense depends on your household’s habits. If you can easily shift dishwasher, laundry, EV charging, and pool pump use to off-peak hours, you can save 10–25% on bills under most TOU plans. If your peak-hour use is high and inflexible (working from home, evening cooking with electric stove), a standard flat rate may cost less.

    Check with your utility about available rate plans. Most allow free switching with limited frequency, so you can experiment if curious.

    A 30-Day Quick-Win Plan

    Here’s a practical month-long sequence that captures most of the available savings without overwhelming you. Each week takes 30–60 minutes and stacks on the prior weeks.

    Four Weeks to a Lower Bill

    Week 1 — Thermostat & laundry. Adjust thermostat to 68°F winter / 78°F summer. Switch to cold-water laundry. Wash full loads only. Total cost: $0.

    Week 2 — Vampire loads. Buy two power strips ($10–20). Plug entertainment center into one, home office into another. Switch off at end of each day. Lower water heater to 120°F. Total cost: $10–20.

    Week 3 — Sealing & lighting. Buy weather-stripping for any drafty doors ($10–20). Replace top 5 incandescent bulbs with LEDs ($15–25). Caulk any visible gaps. Total cost: $25–50.

    Week 4 — Smart thermostat (optional). If your home has a compatible HVAC system, buy and install an ENERGY STAR certified smart thermostat ($100–200). Set up schedules for occupied/unoccupied periods. Total cost: $100–200 (optional).

    Total upfront cost: $35–270, depending on whether you do the smart thermostat. Expected annual savings: $200–500+ for most households, with most of it coming from the first three free or low-cost weeks. Payback period: usually under six months for the no-cost changes, under a year for everything.

    Things Marketing Will Try to Sell You That Are Probably Not Worth It

    “Power saver” devices. Small boxes that plug into outlets and claim to dramatically reduce your electricity bill are almost universally scams. The Federal Trade Commission has issued warnings about these products. They don’t work as advertised, and the testimonials are often fabricated. Save your $50.

    Whole-house surge protectors marketed as energy savers. Surge protectors protect equipment from voltage spikes — useful. They don’t reduce electricity consumption. The marketing claims that conflate the two are misleading.

    Expensive “smart” appliances when your current ones work. Replacing a functioning appliance to save a few dollars a month rarely pays back the purchase cost. The exception is genuinely old (15+ years) appliances near end of life — replacing those at end of life with ENERGY STAR models makes sense.

    Premium HVAC filters. Mid-range pleated filters work fine for most homes. High-MERV filters can actually reduce HVAC efficiency in older systems that aren’t designed for them. Match the filter to the system’s specs, not to whatever’s marketed as premium.

    Solar panels as a quick fix. Solar is a real and often good investment, but it’s a 15–30 year horizon decision with substantial upfront costs and considerations around roof angle, local rates, and incentives. It’s not “easy” and shouldn’t be evaluated alongside swapping light bulbs. Get the cheap wins first; consider solar as a separate, longer-term project.

    Federal Rebates and Tax Credits

    For larger upgrades — heat pumps, insulation, energy-efficient windows, electrical panel upgrades — federal tax credits and state rebates can substantially offset the upfront cost. The DOE’s Energy Savings Hub at energy.gov/save tracks current Home Energy Rebates and tax credits, which are managed by your state, territory, or Tribe.

    For most readers of this article, the rebates aren’t the primary path — they’re relevant when you’re already planning a major upgrade. The thermostat, weatherstripping, LED bulbs, and power strips changes above produce most of the savings most households can capture without major investment. The rebates make sense if you’re already replacing a dying furnace, water heater, or HVAC system.

    Worth checking what’s available in your area before any major home equipment purchase. Programs change frequently; the DOE Energy Savings Hub is the authoritative starting point.

    Common Mistakes to Avoid

    Trying to change everything at once. The four-week plan above works because it sequences changes rather than overwhelming you. Trying to overhaul every appliance, replace every bulb, and audit every outlet in a single weekend leads to incomplete projects and old habits resuming.

    Focusing on small stuff while ignoring HVAC. Replacing every bulb in the house with LEDs saves real money but doesn’t approach what a thermostat adjustment does. Don’t optimize the 5% category before you’ve addressed the 50% category.

    Setting the thermostat to extreme temperatures. 60°F in winter and 85°F in summer save money but make the house unpleasant enough that you’ll start using space heaters and fans extensively — which often consume more electricity than the central system you were trying to avoid. Comfort-tolerable settings (68°F / 78°F) are sustainable.

    Buying things to “save energy” without checking the math. Any energy-saving product that costs hundreds of dollars and promises modest monthly savings needs payback-period analysis. If the payback is over 5 years, the product probably isn’t worth it. ENERGY STAR’s website lists actual estimated savings for most products — use the official figures rather than marketing claims.

    Ignoring the utility’s own programs. Many utilities offer free home energy audits, rebates on efficient equipment, and assistance programs for households with limited income. Call your utility or check their website before assuming you have to pay for everything. The audits in particular are often free and identify specific, customized opportunities you can’t find from a general article.

    Expecting overnight changes in the bill. Most of these adjustments save energy continuously over months. A one-month bill might not reflect changes dramatically because of weather variation. Compare year-over-year for the same season to see real effects — a colder winter naturally costs more even with efficiency improvements.

    Small Changes, Real Compounding Savings

    The energy industry would love to sell you a $5,000 solution to a problem that mostly responds to $50 of effort. The truth is that most households waste enough electricity through thermostat habits, vampire loads, hot-water defaults, and air leaks that fixing those four things alone produces savings comparable to what major appliance upgrades produce — at a fraction of the cost.

    The lever order matters. Heating and cooling first, water heating second, electronics and lighting third, appliance upgrades last (and only when something is genuinely dying). Two degrees on the thermostat and a power strip on the entertainment center will outperform a fancy new toaster every time.

    Pick three changes from this article this week. Adjust the thermostat, switch to cold-water laundry, and put your TV setup on a power strip. The combined annual savings from those three free or near-free moves typically exceeds $200. That’s a worthwhile return on a single afternoon of effort, repeating itself every year you keep the habit.

    This article is for general informational and educational purposes only. Energy savings vary significantly by climate, home characteristics, household habits, electricity rates, and equipment age. Consult ENERGY STAR (energystar.gov), the Department of Energy’s Energy Saver website (energy.gov/energysaver), and your local utility for guidance specific to your situation, and consult a licensed professional for major electrical, HVAC, or plumbing modifications.
  • The Basics of Organizing a Small Apartment

    The Basics of Organizing a Small Apartment

    A 500-square-foot apartment isn’t the same problem as a 3,000-square-foot house. In a small space, every decision compounds — what’s on the counter, what’s under the bed, what’s on the floor, all visible at the same time, all affecting how the room feels. The good news is that small apartments are easier to organize than large homes once you understand the underlying principle: small-space organization isn’t about clever storage hacks, it’s about owning less and storing what you own correctly. This guide covers the actual basics — how to think about space, what to actually do (and not do) with the limited square footage you have, and how to keep your apartment functional, safe, and pleasant to live in. The advice draws on guidance from the Environmental Protection Agency’s guide to indoor air quality and the U.S. Fire Administration’s home fire escape planning, because organization in a small space isn’t just an aesthetic concern — it affects ventilation, safety, and how livable the space actually is.

    A quick framing note. This article is about organizing what you already have. If your apartment feels overwhelming because of accumulated clutter, a focused decluttering weekend comes first; you can’t organize a thousand objects into a small space, you can only reduce them. If you’re past that step and ready to think about how to arrange what’s left, this guide is the framework.

    The Principle That Matters Most: Own Less, First

    The single biggest mistake people make in small apartments is trying to organize their way out of having too much stuff. No system, no clever bin, no over-door organizer will solve a space problem caused by owning more than the apartment can comfortably hold. The honest fact is that storage furniture in a small apartment takes up the floor space you were trying to free up. A bulky storage ottoman that holds blankets you don’t use is a net loss.

    The realistic rule for a small apartment: aim for what you actually use, not what you might use. Three sets of sheets, not seven. One coffee table, not a coffee table plus a side table plus a console. The mugs you actually drink from, not the twelve mugs you’ve accumulated over the years. Every additional object competes for the same finite square footage.

    Once your possessions match your space, organizing becomes much easier — and you’ll find that most of the “small space hacks” articles on the internet stop being necessary. You don’t need to hang mason jars on the wall for kitchen storage; you have enough cabinet space because you don’t own ten redundant utensils.

    Map Your Zones Before You Map Your Storage

    Most small-apartment organization advice jumps straight to “buy these bins.” Skip that. The first step is defining what each part of your apartment is for. In a one-bedroom or studio, each square foot has to multitask, and trying to use every square foot for everything is what creates the constant feeling of chaos.

    Walk through your apartment with a notebook (or just mentally) and identify your functional zones:

    Sleep. Your bed and the area immediately around it.

    Work. Where you sit with a laptop, write, take video calls. Could be a desk, a kitchen table, a corner of the couch — but it should be a defined spot.

    Relax. Where you sit to watch shows, read, or unwind. Often the couch or a chair.

    Eat. A table, a counter, or whatever surface you use for meals.

    Cook. The kitchen workspace itself.

    Store. Closets, shelves, the area under the bed, and any actual storage furniture.

    Transition. The entryway — where shoes, keys, mail, and outerwear live when you come home.

    In a studio, several of these zones overlap. That’s fine — but each should still have a primary purpose. The mistake is when “the couch” becomes simultaneously the sleeping spot, work spot, eating spot, and laundry-folding spot. When zones blur into one another, surfaces become permanently cluttered because nothing has a real home.

    After identifying zones, the organizing question for each zone becomes specific: what does this zone need within arm’s reach, and what doesn’t belong here at all? The work zone needs a charger and a notebook within reach; it doesn’t need the bath towels.

    Vertical Space Is Underused Space

    Most small apartments have plenty of unused vertical space. Walls go up six to nine feet; storage typically stops at three or four. The simplest way to add usable storage without adding floor furniture is to go up.

    Shelves above doorways and windows. The 12–18 inches of wall above doorways is usually empty and can hold a shelf for books, decorative items, or out-of-season storage.

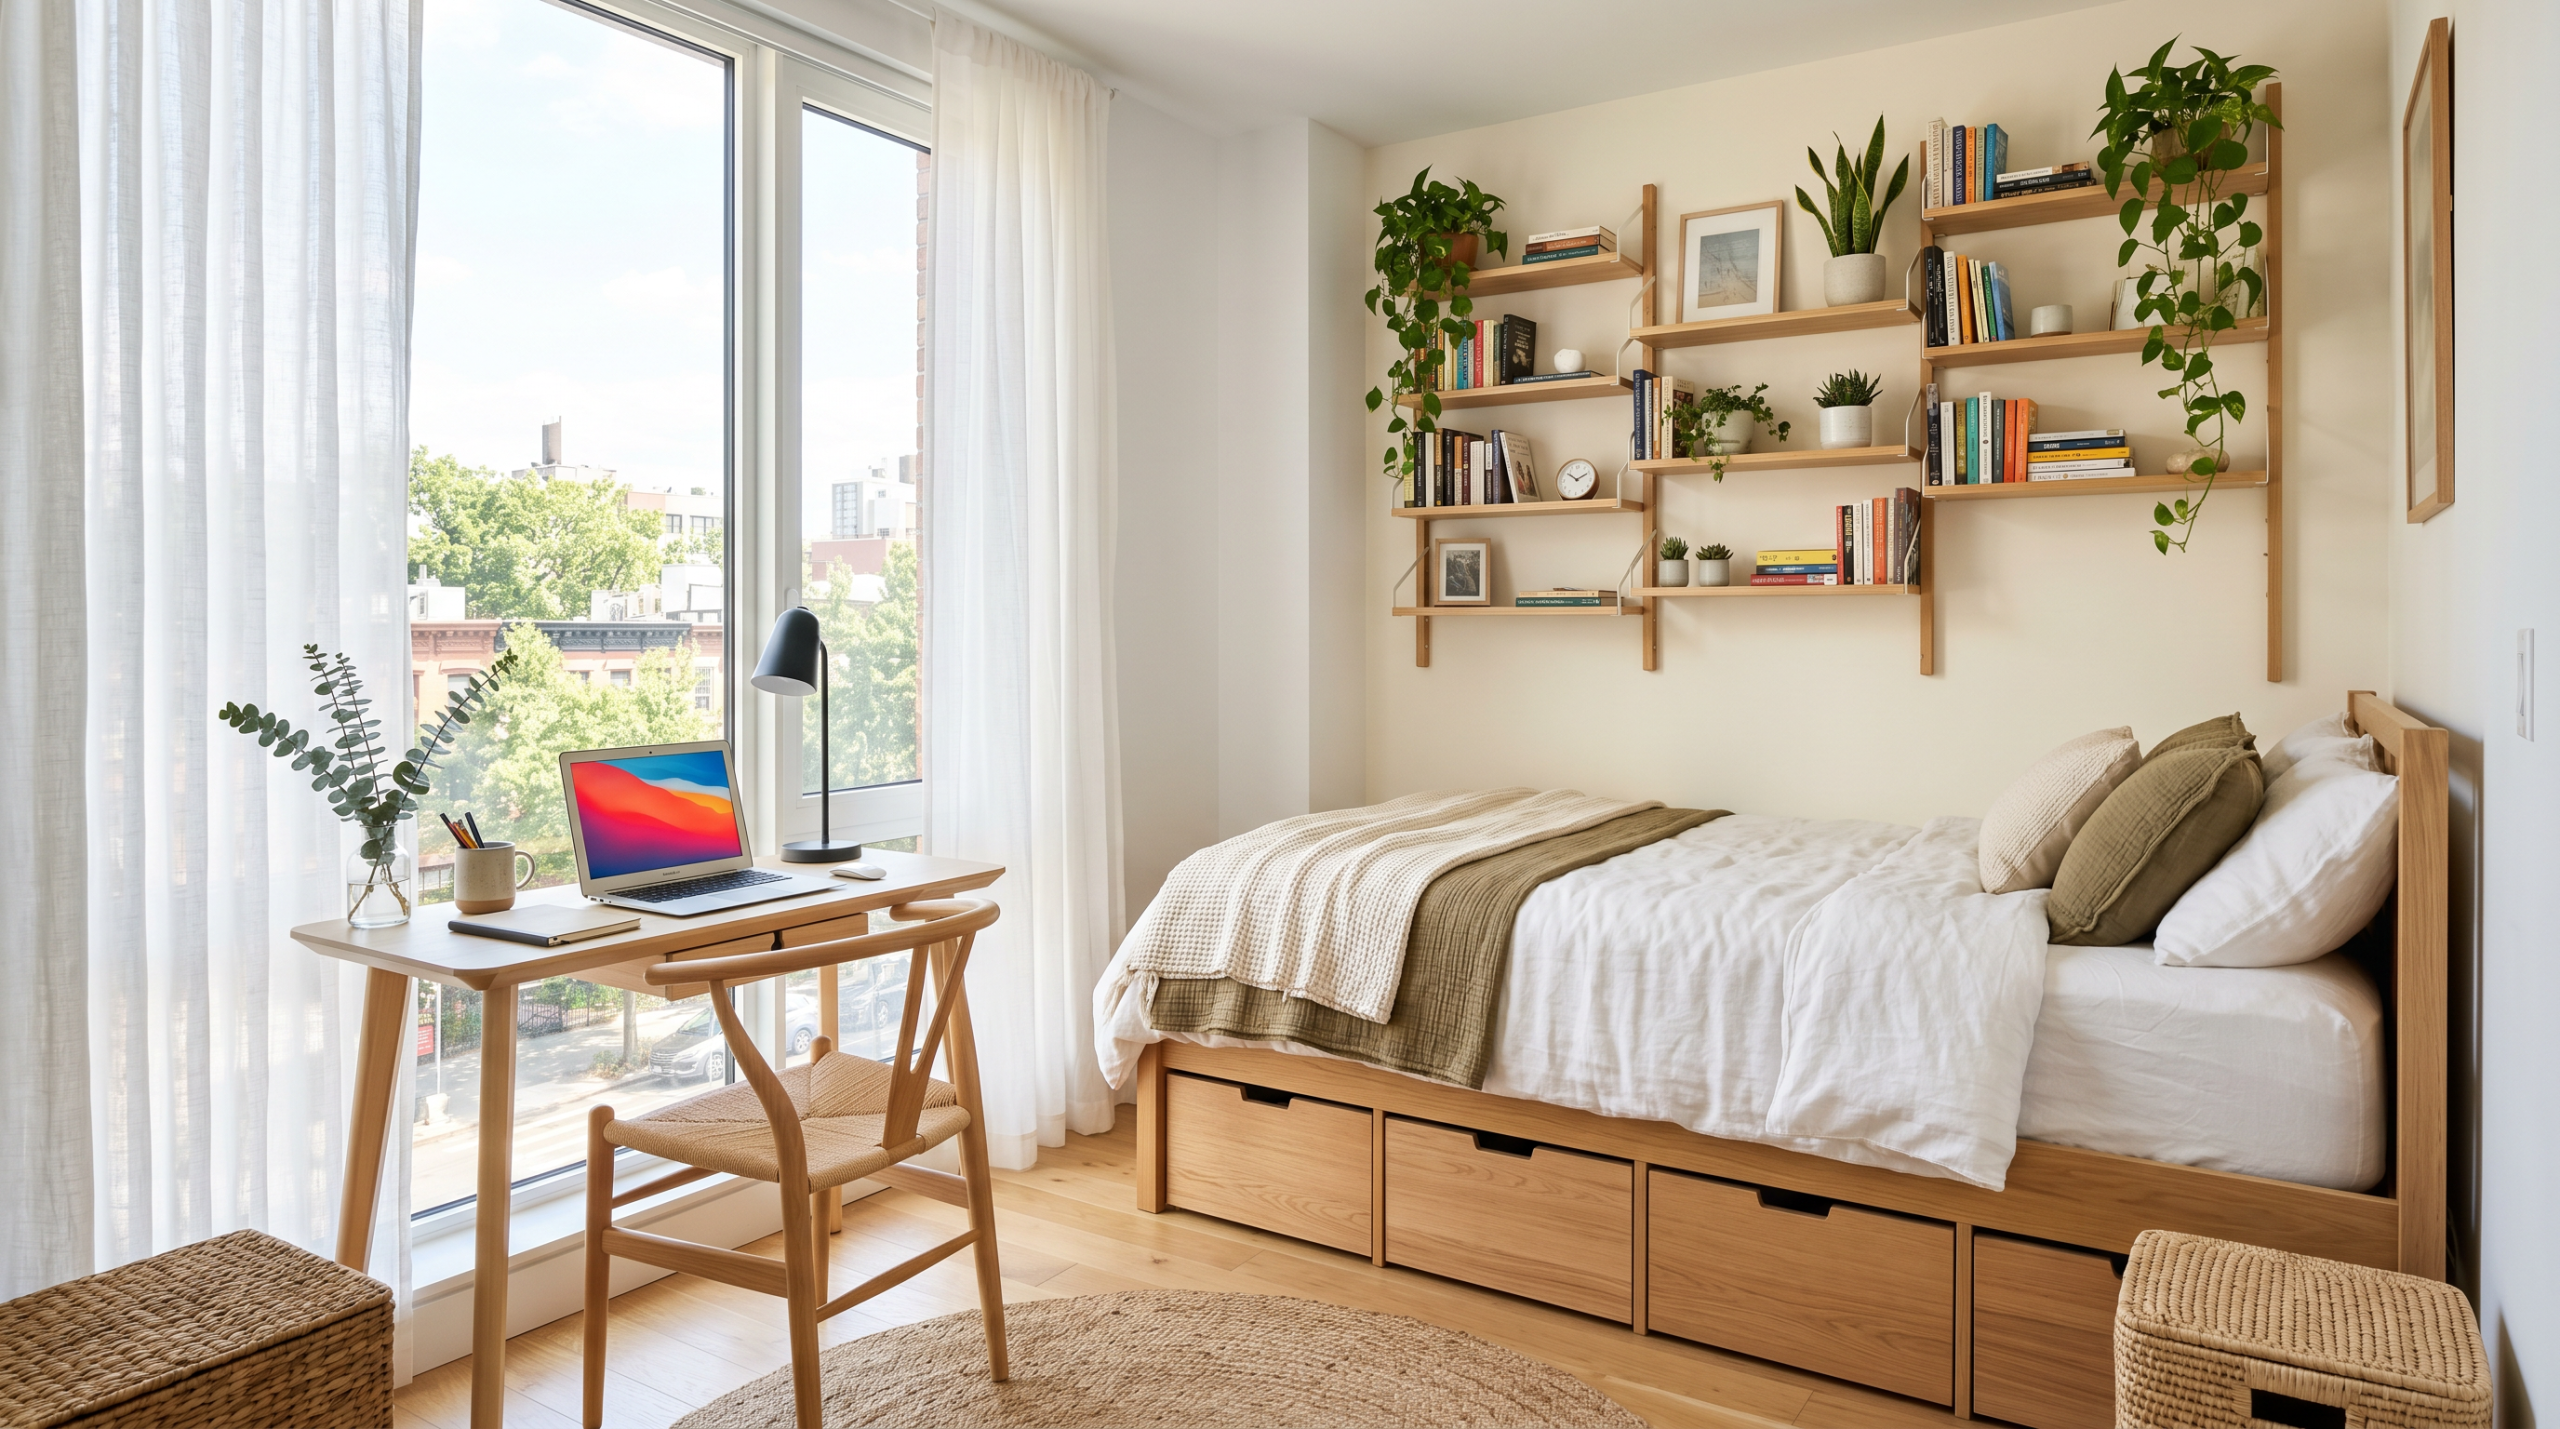
    Wall-mounted shelving instead of bookcases. A floor-to-ceiling bookcase takes up significant floor space. The same volume of storage in wall-mounted shelves takes none. Renters can usually install small wall anchors (and patch them when moving out) without losing the security deposit; check your lease.

    Tall narrow furniture beats short wide furniture. A tall, narrow dresser holds the same clothes as a wide one but occupies half the floor footprint. The same principle applies to bookshelves, side tables, and cabinets — go vertical when possible.

    Use the top of cabinets. The space above kitchen cabinets is often unused. Decorative baskets up there can store items used infrequently — holiday dishware, large pots, small appliances you use a few times a year.

    Vertical storage inside the closet. A second clothing rod hung below the existing one doubles closet hanging space for shorter items. Over-door hangers and shoe organizers use the back of the closet door, which is otherwise wasted.

    A note on safety: anything stored high should be secured. Heavy items on tall shelves can fall during normal activity, and earthquake-prone regions especially benefit from anchoring tall furniture to the wall. Lightweight items only on high shelves; heavier things stay low.

    A Realistic Zone-by-Zone Approach

    Zone Common Problem Simple Fix
    Entryway Shoes, mail, keys scattered Single bowl for keys + small shoe rack
    Kitchen counter Appliances covering workspace Leave only daily-use items out
    Cabinets Mugs/dishes stacked unstably Reduce to what you use weekly
    Living area Surfaces accumulate everything Keep 50%+ of surfaces empty
    Bedroom floor Clothes pile on the chair Remove the chair; force decisions
    Under the bed Dust + forgotten storage Low flat bins for seasonal items only
    Closet Overpacked with unworn clothes Reduce by 30%, then add second rod
    Bathroom Counter buried in products Drawer organizer + over-toilet shelf

    The Entryway: Your First and Last Impression

    The entryway sets the tone for the whole apartment. It’s the first thing you see when you walk in and the last thing you see when you leave. A cluttered entryway makes the whole apartment feel cluttered, even when other rooms are reasonably organized.

    In a small apartment, the entryway is often just a section of floor by the door — there’s no dedicated “foyer.” Make it work anyway with three things:

    A small shoe rack or basket. Limited to the shoes you wear regularly. The two or three pairs in current rotation. Other shoes live in the closet. Limiting the rack to 3–4 pairs forces this constraint naturally.

    One landing spot. A small bowl, tray, or hook for keys, wallet, and mail. The single most reliable way to stop losing your keys is having one specific spot for them and putting them there every single time.

    Wall hooks for one or two jackets. The jacket in current rotation, plus maybe an umbrella. Other coats live in the closet.

    What the entryway is not: a place to accumulate everything that came home with you. The Amazon boxes, the dry cleaning, the bag of returns — those need to move to their next destination, not live by the door.

    The Kitchen: Less Counter Stuff, Better Cabinets

    Small kitchens have two problems: limited counter space and limited cabinet space. Both can be dramatically improved by reducing what you own before adding any “organization” furniture.

    Clear the counters first. Anything that lives on the counter should be used at least 3–4 times per week. The toaster you use daily earns counter space; the air fryer you used twice doesn’t. Items used occasionally go in a cabinet. Items used a few times a year either go in the back of a high cabinet or get rid of altogether.

    Pots and pans: edit ruthlessly. Most home cooks use the same three pans 90% of the time. The second skillet, the wok you bought for one recipe, the dutch oven that gathers dust — these eat cabinet space disproportionately. Keep your daily lineup; donate or store the rest.

    Mugs, glasses, and dishware: match the household. If two people live in the apartment, six dinner plates is enough — not twelve. Same with mugs, bowls, and water glasses. A small household doesn’t need a 12-place setting. The dishware you use daily plus a few extras for guests is plenty.

    Vertical organizers in cabinets. Stackable shelves inside cabinets double the usable space by adding a second tier for plates, bowls, or pantry items. Drawer organizers do the same for utensils.

    A note on safety: the EPA’s guidance on indoor air quality specifically mentions that improperly adjusted gas stoves can emit significant carbon monoxide, and small kitchens with limited ventilation are at particular risk. Run the exhaust fan when cooking, especially with gas; open a window when possible. The EPA’s guidance on improving indoor air quality recommends increasing outdoor air via natural ventilation when weather permits.

    The Living Area: The Surface Rule

    Living areas in small apartments suffer from one specific problem: every horizontal surface becomes a magnet for whatever’s currently in motion. Mail, books, remote controls, charging cables, snacks, water glasses, mugs from yesterday. Within a week, the coffee table is invisible.

    The fix is one rule: at least half of every horizontal surface should be empty when the room is “clean.” Not perfectly empty — that’s exhausting to maintain. But half empty as the reset point. This gives you something to actually return to when you tidy up, instead of just shuffling clutter around.

    For coffee tables specifically: pick three things you want to live there permanently (a couple of books, a candle, a plant) and remove everything else when the day ends. The remote controls go in a drawer or basket. The cables go where they’re charged. The water glass goes to the kitchen.

    Furniture that doubles as storage. Ottomans, benches, and side tables with hidden storage are useful in small apartments only if you actually use the storage. An ottoman full of blankets you reach for daily, useful. An ottoman full of stuff you forgot exists, just expensive clutter in a more confined form.

    Cable management. Tangled charging cables and power strips visually clutter any space. Velcro cable wraps, a single power strip in a discreet location, and stick-on cable channels along baseboards make a real difference. None of this costs much money.

    The Bedroom (or Bed Area in a Studio)

    In a small apartment, the bed dominates the bedroom — there’s not much space around it. Organizing the bedroom is mostly about making the bed itself a calm zone and managing the few surfaces around it.

    The chair problem. Most bedrooms have a chair that becomes the laundry chair within two weeks. If this is happening, you have three options: remove the chair, force yourself to keep it clear, or accept the laundry pile as reality. Removing the chair is usually the most effective solution. Without a designated landing spot, clothes either get put away or end up in the hamper — both of which are better outcomes than the chair purgatory.

    Under-bed storage. Useful for seasonal items: out-of-season clothes, extra bedding, suitcases. Flat plastic bins on rollers make access easier. Don’t use the space for things you need regularly — pulling out a bin every day creates friction.

    Bedside surface. A single small drawer or floating shelf is usually enough. Phone, book, lamp, glass of water — that’s the bedside lineup. Anything more accumulates fast.

    The closet. Reduce by 30% before adding any storage solutions. After reducing, a second clothing rod hung below the existing one doubles capacity for shirts and folded pants. Shoe storage on the floor of the closet or behind the door. Sweaters and folded items in a small dresser if the closet doesn’t have shelves.

    The Bathroom: Editing Products

    Small bathrooms accumulate product clutter faster than any other room. Skincare, haircare, cleaning supplies, medications, towels — all competing for very limited storage. Editing matters more here than in any other space.

    Throw out expired products. Sunscreen loses potency. Old mascara harbors bacteria. Half-used skincare you stopped using months ago is dead weight. Be ruthless — even unopened products often expire.

    Over-the-toilet shelving. The single highest-leverage addition to a small bathroom. The wall above the toilet is almost always unused; a narrow shelving unit there adds significant storage without taking floor space.

    Drawer dividers. Bathroom drawers become chaos quickly. Cheap plastic or fabric dividers separate categories — hair stuff, skincare, dental, makeup — and keep the drawer functional.

    Towel limit. Most small bathrooms work with two sets of towels per person and a few hand towels. Stacks of towels you never use waste closet or shelf space. Donate excess.

    Ventilation matters. Bathrooms in small apartments are particularly prone to mold and humidity issues if not ventilated. Run the exhaust fan during and for 20 minutes after showers. If there’s no fan, open a window when possible. The EPA’s indoor air quality guidance specifically calls out moisture and inadequate ventilation as primary indoor pollutant sources.

    Safety First: Don’t Block Exits

    In the rush to maximize storage in a small space, it’s tempting to use every corner — including spaces near doors and windows. Don’t. The U.S. Fire Administration’s guidance on home fire escape plans is direct on this point: when creating an escape plan, make sure doors and windows are not blocked, and find two ways out of every room.

    In a small apartment, this means:

    Never block the front door. No furniture, bins, or piles that would slow you down getting out. Including not stacking things in front of the door “temporarily.”

    Keep windows accessible. Windows are a secondary escape route. Heavy furniture blocking a window means losing that option in an emergency.

    Make sure your smoke alarm works. Test it monthly. Replace batteries when they signal low. The USFA recommends working smoke alarms in every sleeping room and outside each separate sleeping area.

    Have an escape plan. Know two ways out of your apartment — the front door and either a window or alternate path. The USFA emphasizes that home fire escape plans should be drawn, practiced, and known by everyone in the household. In an apartment building, also know the stairs (never use the elevator in a fire) and where they exit the building.

    These aren’t theoretical concerns. Apartment fires are more common and often spread faster than house fires due to shared walls and common areas. The small effort of keeping exits clear has outsized payoff in the rare emergency.

    Maintaining an Organized Small Apartment

    Even a perfectly organized small apartment drifts back toward clutter without maintenance. The good news: small apartments are easier to maintain because there’s less area to manage. The reality: small apartments also show clutter faster because everything is visible.

    The Three Daily Habits That Keep It Working

    1. The 10-minute evening reset. Last 10 minutes of the day: dishes in the dishwasher, items back where they live, mail sorted, shoes by the door. Done every day, this prevents the slow drift to chaos.

    2. One-in, one-out. New item arrives in the apartment? Something equivalent leaves. This is more critical in small spaces than large ones because there’s no slack capacity.

    3. Don’t let surfaces accumulate. Every surface — counter, table, dresser top — has to be at least half empty by end of day. This is the single rule that prevents the “where did all this come from” feeling.

    Common Mistakes to Avoid

    Buying storage furniture before decluttering. The bins, baskets, and ottomans you buy to “solve” the storage problem will sit half-empty (or full of things you should have thrown out) once you actually reduce what you own. Declutter first; then buy only what you still need.

    Bulky furniture in tiny rooms. A massive sectional sofa in a 200-square-foot living area dominates the space and prevents anything else from working. Match furniture scale to room scale. Smaller pieces fit better and leave room for actual life.

    Treating every wall as storage. Some empty wall space is important — it lets the eye rest and prevents the apartment from feeling oppressive. Storage on every wall makes a small apartment feel like a warehouse.

    Filling every surface with decorative items. Decorative items have a place. Filling every surface with them just makes a small apartment look cluttered while you tell yourself it’s “personality.” A few intentional decorative pieces beat dozens of unintentional ones.

    Storing things you’ll “use someday.” Storage space in a small apartment is too valuable for hypotheticals. If you haven’t used something in a year, the chance you’ll need it in the next year is small. Donate it; reclaim the space.

    Buying clear bins that you can’t see into. A bin you’ve stuffed under the bed or on top of a cabinet only works as storage if you remember what’s in it. Clear bins or labeled opaque bins solve this. Anonymous bins become permanent mystery boxes.

    Ignoring ventilation. Small spaces concentrate indoor air pollutants faster than large ones. Cooking, cleaning products, and even some furniture release VOCs into a closed apartment. Open a window when you can; run exhaust fans during cooking and showering; consider an inexpensive air-purifying plant or small HEPA filter if you have particular concerns.

    Trying to make it look like Instagram. Instagram apartments are staged for photos, not lived in. Real homes have actual functioning kitchens with daily-use items visible, not perfectly minimal countertops with one artisan ceramic. Aim for “functional and pleasant,” not “social media perfect.” The latter doesn’t sustain.

    Small Apartments Reward Discipline, Not Cleverness

    The internet is full of clever small-space hacks — magnetic strips for knives, hanging fruit baskets, foldable everything. Some are useful. Most are answers to a problem that didn’t need to exist: owning more than your apartment can comfortably hold. A small apartment with the right amount of stuff doesn’t need most of the clever tricks. It just needs the basics done well.

    The basics: define zones for each function. Reduce possessions to what you actually use. Use vertical space when you need more storage. Keep half of every surface empty as the reset state. Maintain a 10-minute evening tidy. Don’t block exits. Run exhaust fans. Have an escape plan.

    Done consistently, these basics produce an apartment that feels good to come home to — not because it’s photo-ready, but because everything has its place, and finding what you need takes no thought. That’s the real point of organizing a small space. The space serves you, not the other way around.

    This article is for general informational and educational purposes only. Local regulations on installations, smoke alarms, ventilation, and rental modifications vary; consult your lease, your building management, and the EPA’s and USFA’s official resources for guidance specific to your situation.

  • How to Start a Low-Maintenance Indoor Garden

    How to Start a Low-Maintenance Indoor Garden

    Most people who say they “can’t keep plants alive” don’t have a black thumb — they have the wrong plants in the wrong spots, watered on the wrong schedule. Indoor gardening has a reputation for being demanding because most articles about it lump easy plants in with finicky tropicals, leaving beginners with the impression that everything green requires daily attention. The truth is that a handful of well-chosen species, paired with a few simple care principles, can give you a thriving indoor garden that needs maybe ten minutes of attention per week. According to the University of Maryland Extension’s resources on indoor plant selection and care, the foundation of success is matching the plant to your specific light conditions — not the other way around. This guide focuses on the genuinely low-maintenance species, the small set of rules that prevent the most common failures, and the realistic expectations that turn first-time plant owners into people who actually keep plants alive.

    A quick framing note. This guide is for people who want greenery in their home without it becoming a hobby — not for serious houseplant collectors. Many beautiful houseplants exist that need humidifiers, special soil, specific window orientations, and weekly attention. None of those plants appear in this article. The recommendations below are the species that survive forgetful owners, inconsistent watering, mediocre light, and the routine neglect of a busy life.

    Why Most Beginners Kill Their First Plants

    Before picking plants, it helps to understand the three reasons most first attempts at indoor gardening fail.

    Overwatering. This is the single largest cause of houseplant death. The University of Maryland Extension states plainly that overwatering is the most common problem with houseplants. Roots need air as well as water; soil that’s constantly wet suffocates them and invites root rot. Most beginners water on a schedule — “every Sunday” — when they should be watering when the soil actually needs it. We’ll fix this below.

    Wrong plant for the light conditions. A fiddle-leaf fig in a dim apartment will die slowly. A sun-loving succulent in a north-facing room will stretch and weaken. According to the Mississippi State University Extension’s guidance on care and selection of indoor plants, light is the single most important factor in successful indoor gardening — plants use it as energy to make food via photosynthesis, and matching the plant to the available light is the precondition for everything else.

    Plant-store optimism. Walking into a nursery and buying a plant because it’s pretty, with no consideration of where it will live, is how most plant collections start — and most plants die. The lush, beautifully arranged plants in a nursery have been kept in greenhouse conditions: high light, controlled humidity, expert care. The moment they enter the average home, conditions change dramatically. Some species handle this. Many don’t.

    Step One: Figure Out Your Light

    Before buying a single plant, spend a day or two observing your space. Light is the only factor you can’t easily change. Everything else — watering frequency, humidity, fertilizer — adapts around the plant. Light is fixed by where your windows are.

    A simple categorization, drawn from the University of Maryland Extension’s guide on lighting for indoor plants:

    Bright direct light: within a few feet of a south- or west-facing window with no obstructions. The sun hits the leaves directly for several hours a day. Good for cacti and sun-loving succulents.

    Bright indirect light: near a sunny window but not directly in the path of sunlight, or in a room with a south-facing window where the plant sits a few feet away from the window. This is the sweet spot for the majority of low-maintenance houseplants. East-facing windows often provide this naturally.

    Medium light: a few feet from a bright window, or near a north-facing window. Many forgiving plants do well here, though some grow more slowly.

    Low light: well away from any window, or in a room with only small or shaded windows. Few plants genuinely thrive here, but a small handful — pothos, snake plant, ZZ plant, cast iron plant — tolerate it well enough.

    A practical test: at noon on a sunny day, can you read a book comfortably without artificial light at the spot where you’d put the plant? If yes, you have at least medium light. Can you see your hand cast a faint shadow on a piece of paper? You probably have enough light for low-light tolerant species. If neither is true, that spot won’t sustain a plant long-term, regardless of the species.

    The Seven Plants Beginners Should Actually Buy

    These seven species are the genuinely low-maintenance, beginner-proof options that show up consistently across university extension and horticultural sources. They tolerate neglect, varied light conditions, and the inconsistent watering that real life produces.

    Plant Light Water
    Pothos Low to bright indirect When top inch is dry (~7–10 days)
    Snake Plant Low to bright indirect Every 2–4 weeks; let it dry fully
    ZZ Plant Low to medium indirect Every 2–3 weeks; tolerates drought
    Spider Plant Medium to bright indirect When top inch is dry (~7 days)
    Cast Iron Plant Low to medium Every 1–2 weeks
    Philodendron (heartleaf) Medium indirect When top inch is dry
    Aloe Vera Bright indirect to direct Every 2–3 weeks; let soil dry fully

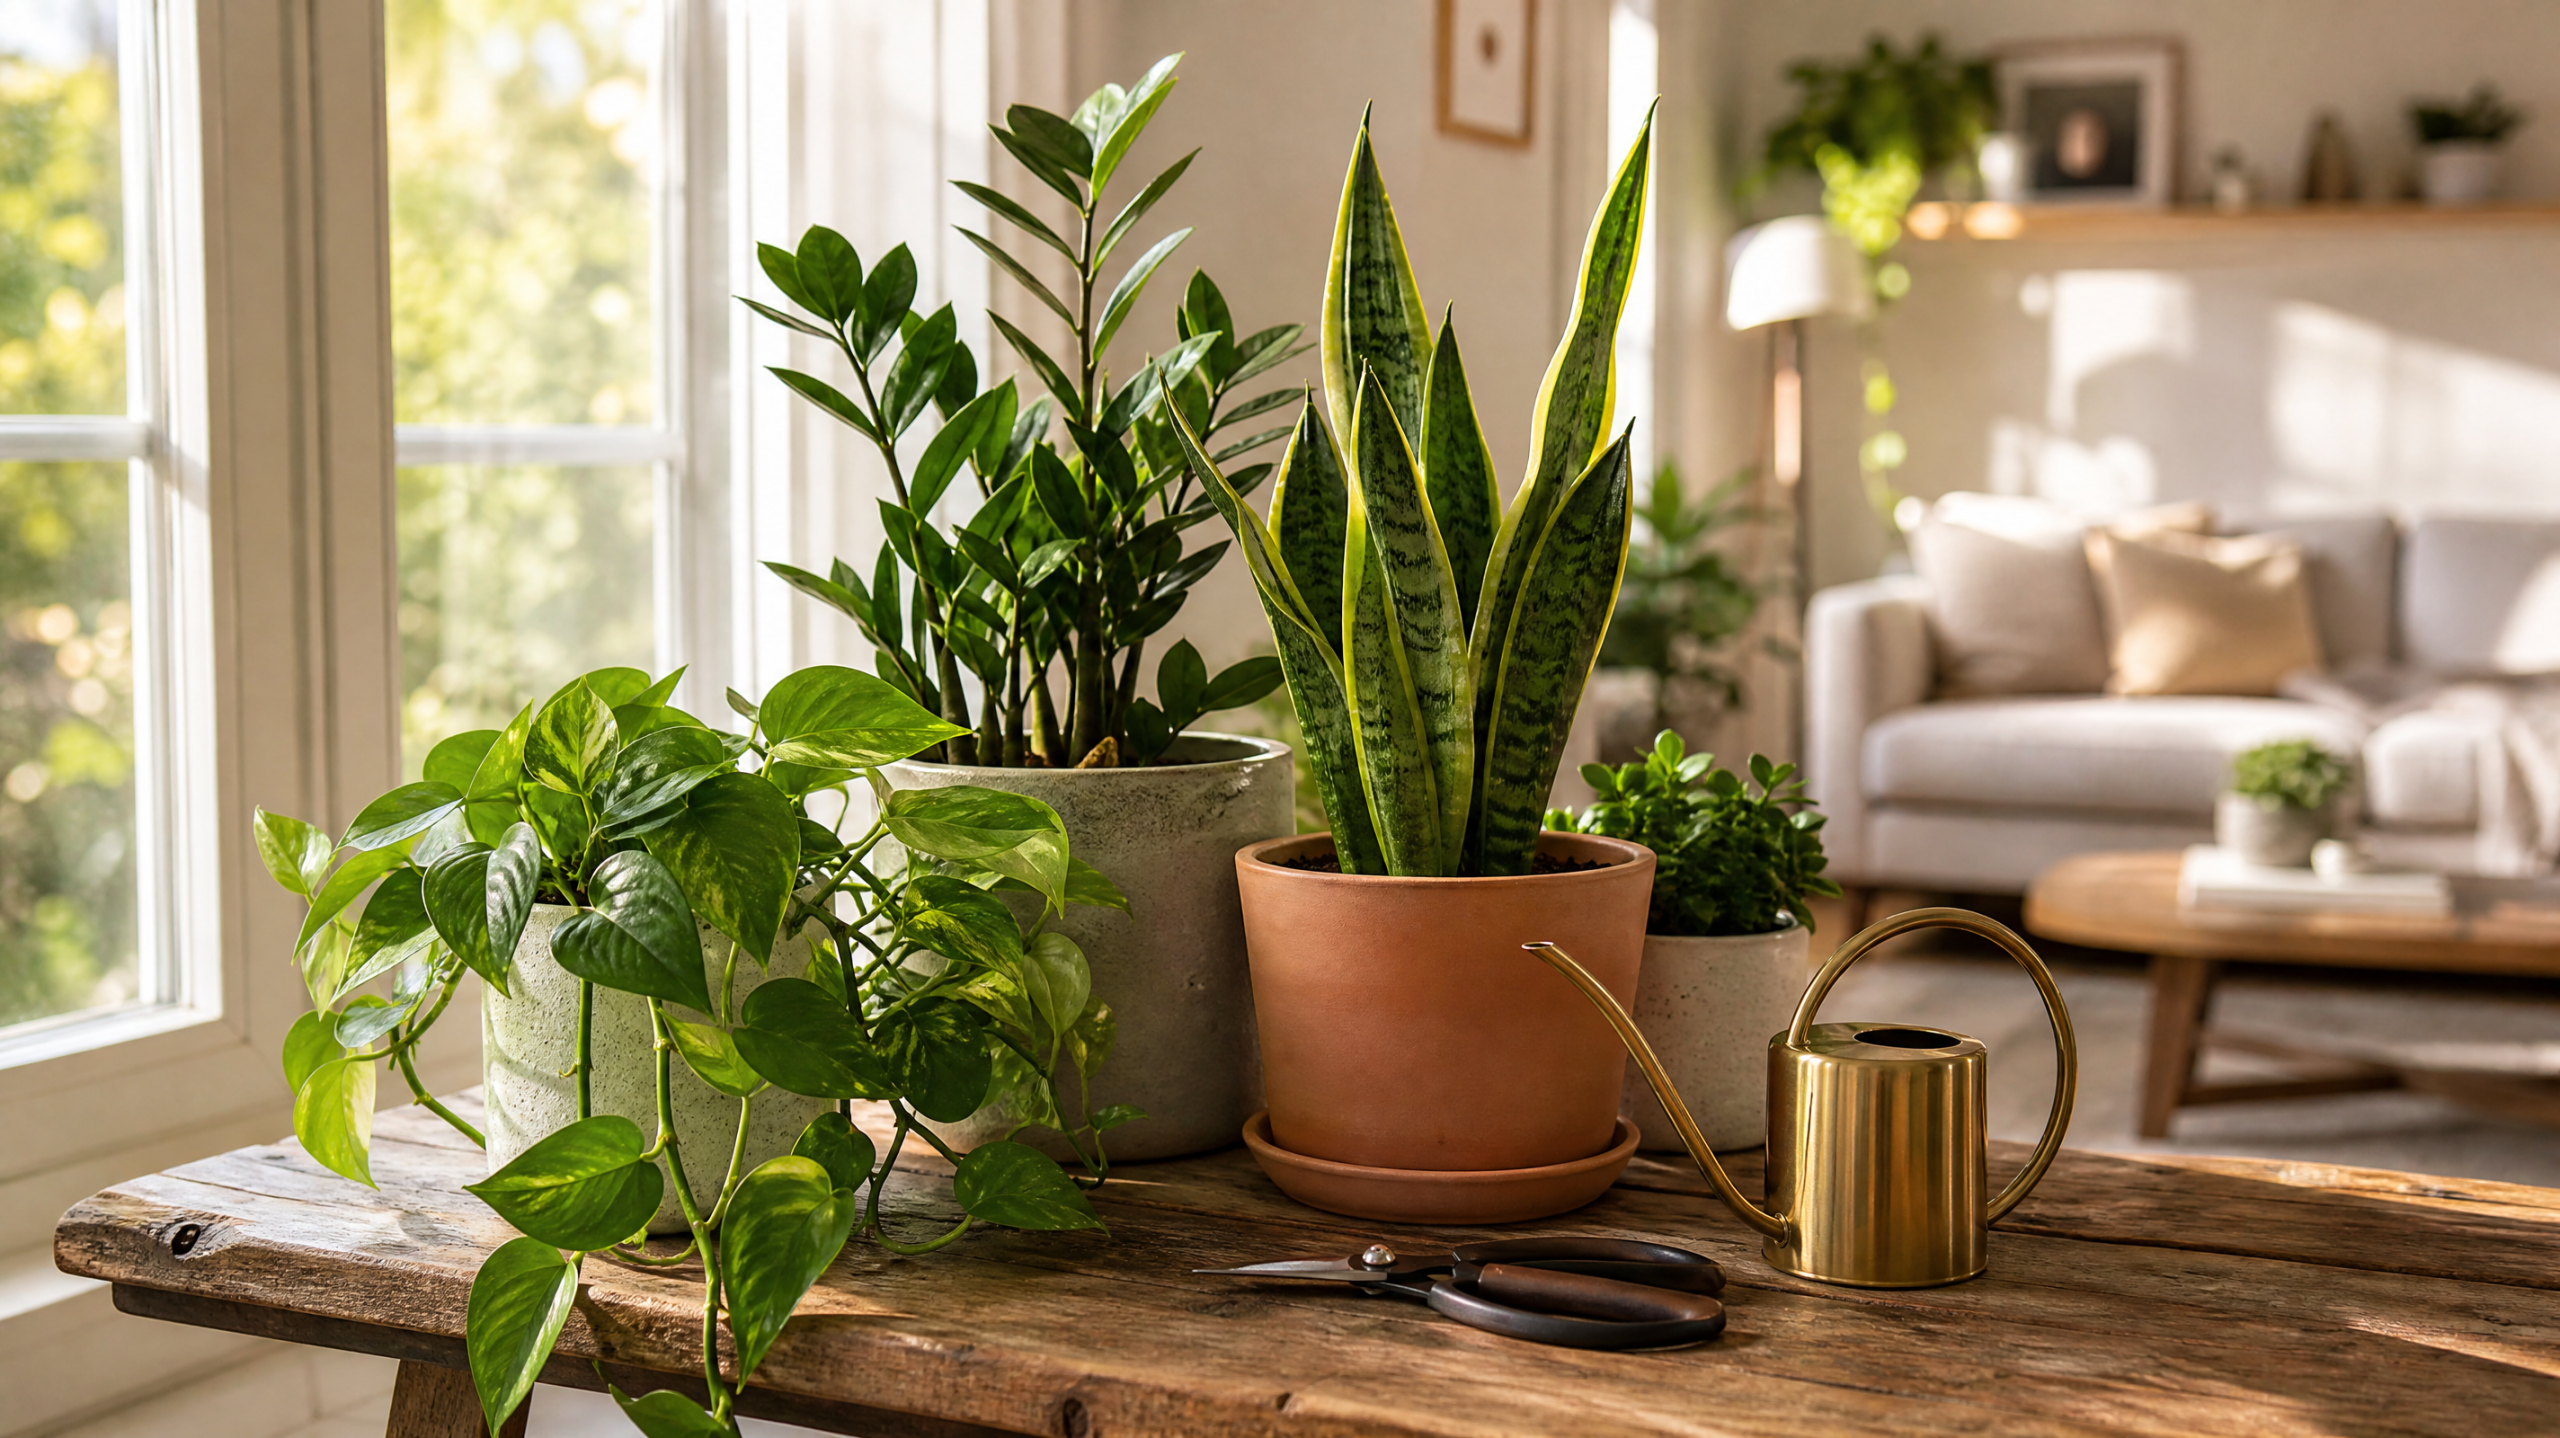
    Pothos (Epipremnum aureum) is the closest thing to an unkillable plant. Trailing vines, heart-shaped leaves, tolerates almost any light condition, and forgives serious neglect. The leaves visibly droop when it needs water — and recover within hours of being watered. If you’ve never kept a plant, start with pothos.

    Snake plant (Dracaena trifasciata) is upright, sculptural, and almost impossible to overwater if you let it dry out completely between waterings. Tolerates the darkest corners of most apartments. Per West Virginia University Extension’s guidance on common houseplant care, snake plants particularly don’t like wet roots — overwatering is the main way to kill them.

    ZZ plant (Zamioculcas zamiifolia) tolerates extreme neglect. It stores water in thick rhizomes underground, which lets it survive weeks of forgotten watering. Glossy dark green leaves grow upright on arching stems. The plant tolerates dim corners better than almost any other species.

    Spider plant (Chlorophytum comosum) produces arching striped leaves and small “spiderette” baby plants that you can propagate into new pots. Grows quickly, tolerates a wide range of conditions, and is non-toxic to pets — a meaningful advantage if you have cats or dogs.

    Cast iron plant (Aspidistra elatior) is named for a reason — it tolerates conditions that would kill most plants. Slow-growing dark green leaves work well in low-light spaces where nothing else will grow.

    Heartleaf philodendron (Philodendron hederaceum) is a trailing vine similar to pothos but with slightly softer, heart-shaped leaves. Tolerates medium light and is forgiving about watering schedules.

    Aloe vera is the one in this list that needs bright light. If you have a sunny windowsill, it’s a great option — sculptural form, useful gel inside the leaves for minor burns, and tolerates drought so well that the main way to kill it is overwatering.

    Important pet-safety note: pothos, snake plants, ZZ plants, philodendrons, and aloe vera are toxic to cats and dogs if ingested. If you have pets that chew on leaves, prioritize the spider plant and cast iron plant, which are generally considered safe. Consult the ASPCA’s toxic plant database or your veterinarian for specific concerns.

    Step Two: Watering Without Killing Your Plants

    According to the University of Maryland Extension’s specific guidance on watering indoor plants, plants should not be watered on a schedule but should be watered when they need it. Factors that influence plant watering include differences in potting media, humidity, and temperature. A large percentage of houseplants are lost because of overwatering and underwatering — and watering on a schedule is precisely how this happens.

    The simple test that solves this: stick your finger into the soil to a depth of about two inches. If the soil at that depth is dry, water. If it’s still moist, wait. That’s the entire rule. Don’t trust the surface — soil can look dry on top while being damp below. Two inches deep is the practical measurement that prevents most overwatering disasters.

    How to actually water. When you do water, water thoroughly: pour water until it flows out of the drainage holes at the bottom. Then dump the excess from the saucer 10–15 minutes later. The Oklahoma State University Extension’s guidance is direct on this point: never leave a houseplant standing in water, as this causes root rot.

    Watering thoroughly and then letting the pot dry partly between waterings is the cycle that mimics natural rainfall in most plants’ native environments. The flood-and-drain pattern flushes accumulated salts from fertilizer and tap water, and the drying period gives roots oxygen.

    Adjust for the season. Most houseplants need significantly less water in winter than in summer. The combination of lower light, cooler temperatures, and the plant’s natural dormancy means roots take up far less water. Many plant deaths happen because people keep watering on their summer schedule into November and December. Cut watering frequency roughly in half during winter for most plants.

    Use room-temperature water. Very cold water can shock plant roots. Filling a watering can the night before and letting it sit overnight both warms it and lets chlorine in tap water dissipate.

    Step Three: The Right Pot

    The pot matters more than most beginners realize. The University of Maryland Extension’s guidance on potting indoor plants emphasizes that the container directly affects how the plant grows and how water and nutrients behave in the soil.

    Drainage is non-negotiable. The pot must have a hole at the bottom. Without one, water collects at the bottom of the pot, the soil stays saturated, and roots rot — even if everything else is right. If you love a decorative pot that doesn’t have drainage, use it as a “cachepot” — put a smaller plain plastic pot with drainage inside the decorative one, and remove it briefly when watering.

    Size matters in both directions. A pot that’s too small confines roots and dries out fast. A pot that’s far too large holds excess water around the roots and can cause root rot. The standard rule: when repotting, choose a pot 1–2 inches larger in diameter than the current one — not much larger.

    Material affects watering. Terra cotta (unglazed clay) is porous and lets water evaporate through the sides, which means plants in terra cotta dry out faster — useful for plants that hate sitting in moisture (snake plants, aloe, ZZ plants). Plastic and glazed ceramic retain moisture longer, better for thirstier plants. There’s no single right answer, but matching the pot material to the plant’s water needs helps.

    Don’t put rocks at the bottom. Old advice said to put rocks or gravel at the bottom of a pot for “drainage.” Modern research has shown this actually makes drainage worse — water collects above the rock layer instead of moving through. A drainage hole is what you need; rocks add nothing.

    Step Four: Soil, Fertilizer, and Repotting

    Soil. Use a bag of basic indoor potting mix from any hardware store or garden center. Don’t use garden soil — it’s too dense, doesn’t drain well in containers, and may bring in pests or diseases. For succulents, cacti, and aloe, use a cactus/succulent mix that drains faster. That’s all the soil knowledge a beginner needs.

    Fertilizer. Houseplants need very little fertilizer compared to outdoor plants. A diluted liquid fertilizer applied once a month during spring and summer (the active growing season) is enough for most species. Don’t fertilize in winter when plants are dormant — you’ll burn the roots. When in doubt, fertilize less, not more. Over-fertilization causes more problems than under-fertilization in houseplants.

    Repotting. Most houseplants need to be repotted every 1–2 years. Signs the plant needs a bigger pot: roots growing out of the drainage holes, water running straight through without being absorbed, the plant becoming top-heavy and falling over, or visibly slowed growth. When repotting, gently loosen the root ball, place the plant in the new pot at the same depth it was at before, and fill in fresh potting mix around it. Don’t water heavily for a few days afterward to let any disturbed roots heal.

    Reading What Your Plants Are Telling You

    Plants communicate problems visibly long before they die. Learning the signals turns “I don’t know what’s wrong” into specific fixes.

    What Plants’ Signals Usually Mean

    Yellow leaves (especially lower leaves): Usually overwatering. Check soil moisture; let it dry out before watering again.

    Crispy brown leaf edges: Underwatering, low humidity, or salt buildup from tap water/fertilizer.

    Drooping leaves that perk up after watering: Underwatering. Adjust frequency slightly.

    Drooping leaves that don’t recover: Probably overwatering and possible root rot. Check the roots — healthy roots are white/cream; rotted ones are brown/mushy.

    Pale, leggy growth with long gaps between leaves: Insufficient light. Move closer to a window or add a grow light.

    Scorched, bleached, or bleached-then-brown patches: Too much direct sunlight, especially through glass. Move to indirect light.

    Sticky residue or visible insects: Pest problem (aphids, mealybugs, scale, spider mites). Treat early with insecticidal soap before it spreads.

    When in doubt, the diagnosis is usually overwatering. It’s the most common cause of every visible problem, and the temptation when a plant looks unhealthy is to water more. Resist that urge until you’ve checked the soil with your finger.

    A Realistic Starter Setup

    If you want a concrete plan, here’s a realistic starter setup that costs around $50–80 total and produces a thriving small indoor garden within a few weeks.

    Three plants. A pothos for a shelf or hanging spot, a snake plant for a side table or floor corner, and a spider plant for somewhere with decent light. Three plants are enough to feel like an indoor garden without being overwhelming. Add more later if these thrive.

    Three pots with drainage and saucers. Match the size to each plant. Cheap plastic pots work fine; decorative cachepots can come later.

    One bag of indoor potting mix. The smallest bag will be more than enough for three plants.

    A watering can (or any container with a spout). A pitcher from your kitchen works fine. Don’t overspend on this.

    A bottle of all-purpose liquid houseplant fertilizer. One small bottle lasts a year or more.

    Skip, for now: humidifiers, grow lights, moisture meters, fancy planters, plant stands, propagation kits, and pH testers. None are necessary for the first six months. Buy them later only if specific plants demand them.

    A Weekly Care Routine That Actually Takes 10 Minutes

    Here’s a realistic maintenance routine for the seven-plant garden you can build over time. Total time: about 10 minutes per week, plus one short monthly task.

    Weekly (about 10 minutes). Walk through your plants. Stick a finger in each pot to check moisture. Water any that need it. Note any obvious changes — drooping, yellowing, new growth. That’s it. The whole walkthrough takes minutes once you know your plants.

    Monthly (about 20 minutes). Add diluted liquid fertilizer to your watering (only spring and summer). Wipe dust off larger leaves with a damp cloth — dust accumulates on leaf surfaces and reduces light absorption. Check for pests on the undersides of leaves and at stem joints, where they hide first.

    Twice a year (about an hour each time). Repot anything that’s outgrown its current pot. Flush soil thoroughly with clear water to leach accumulated salts, per the UMD Extension’s recommendation. Rotate plants if growth has become lopsided toward the light source.

    That’s the entire commitment. Roughly 10 minutes a week, plus an occasional bigger session a few times a year. Less time than most people spend cleaning a single bathroom.

    Common Mistakes to Avoid

    Watering on a fixed schedule. Already covered, but worth repeating: this single mistake kills more houseplants than every disease combined. Water by checking the soil, not by checking the calendar.

    Misting “for humidity.” Light misting from a spray bottle doesn’t meaningfully raise humidity around the plant; the effect dissipates within minutes. If a plant genuinely needs humidity, you need a humidifier, a tray of pebbles with water under the pot, or clustering plants together — not casual misting.

    Buying too many plants at once. Three to five plants is the right starter quantity for someone new to indoor gardening. Twelve is too many to learn from. If a few plants die, you can troubleshoot one or two at a time. With twelve, you can’t tell what went wrong with any of them.

    Moving plants around constantly. Plants adapt to their specific spot, including the exact light and air circulation. Moving them frequently forces them to re-adapt, which often results in dropped leaves and stress. Find a good spot, leave the plant there.

    Ignoring plants until they look bad. By the time leaves are yellow or drooping severely, root damage has often already occurred. A 30-second weekly check catches problems early when they’re easy to fix.

    Buying plants that look stressed at the store. Pale leaves, yellowing, visible pests, or roots growing out of the drainage holes are warning signs. A plant struggling in the controlled conditions of a greenhouse will struggle even more in your less-ideal home. Pick the healthiest specimen from any plant batch.

    Treating houseplants as decor only. Plants are alive. They respond to light, water, temperature, and care. The Instagram-perfect arrangements that ignore plants’ actual needs (a fern in a windowless bathroom corner, succulents far from any window) collapse within months. Pick spots that work for the plant first, decorate around them second.

    Start Small, Stay Curious

    The fastest way to become someone who keeps plants alive is to start with three forgiving species, give them spots that match their light needs, water them when the soil tells you to (not when the calendar does), and resist the urge to add more plants until those three have visibly thrived for several months. Most “I can’t keep plants alive” stories come from people who started with a $40 fiddle-leaf fig in a dim corner and gave up when it died. They didn’t have a black thumb — they picked an aspirational plant for a hostile environment.

    Pothos, snake plants, ZZ plants, spider plants — these aren’t compromise choices. They’re plants that have been thriving in human homes for generations because they evolved in conditions similar to a typical apartment. They’re forgiving by design. Start with them, learn the rhythm of plant care, and add other species later only if you genuinely enjoy the process.

    An indoor garden doesn’t have to be a hobby. For most people, it’s just three to seven plants that make a home feel more alive, demand minimal weekly attention, and quietly reward consistency with steady growth. Start there, keep it small, and let it grow naturally over time.

    This article is for general informational and educational purposes only. Plant toxicity, allergies, and care requirements can vary; consult the ASPCA’s toxic plant database for pet safety information and your local extension service or a qualified horticulturist for specific gardening guidance tailored to your region and conditions.

  • A Step-by-Step Guide to Decluttering Your Home in a Weekend

    A Step-by-Step Guide to Decluttering Your Home in a Weekend

    Most decluttering advice falls into one of two extremes. Either it’s the Marie Kondo approach — months of work, holding each item against your heart, sorting by emotional category across the entire house — or it’s the desperate-Sunday-night approach, where you stuff everything into closets ten minutes before guests arrive. Neither suits most people. The first demands more time than you have; the second doesn’t actually solve anything. This guide is the middle path: a focused, structured weekend of decluttering that makes a visible, meaningful difference in two days, without requiring you to philosophically reconsider your relationship with every object you own. The plan is concrete, the timeline is realistic, and the disposal advice draws on the Environmental Protection Agency’s official guidance on reducing and reusing — because the part of decluttering nobody talks about is what to actually do with the stuff after you’ve decided it’s leaving.

    A quick framing note. This is a one-weekend project — about 12 active hours spread across Saturday and Sunday. It won’t transform every closet, every drawer, and every box in your basement. It will produce a noticeably less cluttered home, a system that’s easier to maintain afterward, and a clear plan for what to do with everything that’s leaving. If you have years of accumulated clutter, this weekend is a strong start, not the complete solution.

    Before You Start: The Two Critical Pre-Decisions

    A successful decluttering weekend depends on two decisions you make before touching a single item. Skip these, and you’ll find yourself paralyzed by indecision halfway through Saturday afternoon.

    Decision 1: What does success look like? Before starting, define what “done” means for this weekend. Is it “the kitchen, living room, and master bedroom are clearly less cluttered”? Is it “all clothes I don’t wear are gone”? Is it “the garage is usable again”? A vague goal like “declutter the house” almost always fails because it has no stopping point. A specific goal — “we’ll do three rooms and the front-hall closet” — gives you something concrete to finish.

    Decision 2: Where is the stuff going? The most common reason decluttering stalls is that bags of “to donate” items sit by the front door for six months, then end up unpacked or moved back into the house. Before you start, identify exactly where things will go: which donation center you’ll use, when you’ll drop them off, where the trash bags are going, where the electronics will be recycled. Vague plans produce vague outcomes. Pick specifics now.

    Once those two decisions are settled, gather supplies: large trash bags, a few cardboard boxes, a marker, and any cleaning supplies (microfiber cloth, a vacuum, all-purpose cleaner). That’s everything you need. You don’t need new storage containers; buying organizing supplies before you’ve decluttered is one of the most common mistakes, since you don’t yet know what you have to store.

    The Four-Pile System

    As you go through each space, every item you pick up gets sorted into one of four piles. Don’t invent more categories. Four is the maximum a human brain can hold steady across hours of repetitive decisions.

    The Four Piles

    1. Keep. Goes back where it belongs (which might be somewhere different than where you found it).

    2. Donate or sell. Still has useful life. Going to a charity, friend, or marketplace.

    3. Recycle or e-waste. Worn out but materials can be properly disposed of. Includes electronics, batteries, and recyclables.

    4. Trash. Truly trash. Nobody wants it, it can’t be recycled, it goes in the bin.

    The trick is sorting fast. The decision for each item should take 5–10 seconds, not 5 minutes. If you find yourself agonizing over a specific object, put it in a fifth temporary “decide later” box — but keep that box small (under 20 items by the end of the weekend), and review it on Sunday evening. Most “decide later” items turn out to be donates once you stop staring at them in the moment.

    The Weekend Plan: Hour by Hour

    Here’s a realistic schedule that gets meaningful decluttering done across two days without burning you out. Adjust to your sleep patterns and obligations, but keep the rough structure: each block is 2–3 hours, with real breaks in between.

    Block Time Task
    Sat AM 9:00–11:30 Bedroom closet + dresser (clothes)
    Break 11:30–12:30 Lunch, leave the house if possible
    Sat PM 12:30–3:00 Kitchen (cabinets, drawers, pantry)
    Sat late 3:00–5:00 Bathroom(s) + one closet
    Sat eve Done Stop. Rest. Don’t push into evening.
    Sun AM 9:00–11:30 Living room + entryway
    Break 11:30–12:30 Lunch + a real walk
    Sun PM 12:30–2:30 Paperwork + miscellaneous drawers
    Sun late 2:30–4:00 Drop-offs + final cleanup

    About 12 hours of focused work total. Notice what’s intentionally missing: the basement, the garage, the attic, the kids’ rooms, sentimental boxes. Those each need their own dedicated time. Trying to add them turns one weekend into a doomed marathon. Pick a follow-up weekend in 4–6 weeks for one of those zones, and keep this weekend’s scope realistic.

    Saturday Morning: The Bedroom Closet

    Start with clothes for one specific reason: they’re the easiest category to make decisions about. Either it fits, you wear it, and you like wearing it — or you don’t. Decisions are fast, the visible impact is huge, and the momentum carries you into harder zones.

    Empty everything. Pull everything out of the closet and drawers onto the bed. Yes, all of it. Seeing the actual volume of clothing you own — usually 3–5 times what people estimate — is the entire point.

    Apply three filters. For each item, ask three quick questions in order: Does it fit? Have I worn it in the past year? If it were in a store right now, would I buy it? If the answer to any one of these is “no,” it’s not a keeper. The third question is the most powerful — it cuts through the sunk-cost fallacy that keeps people holding onto clothes they spent money on but never wear.

    Be honest about special occasions. “I might need it for an interview” or “what if there’s a fancy event” justifications protect a lot of unused clothes. Keep one or two formal outfits if you genuinely need them, but be skeptical. Most people own more “special occasion” clothing than they’ll ever wear.

    Worn-out items go to recycling, not donation. Donating clothes with stains, holes, or broken zippers wastes the time of charity sorters. Many municipalities have textile recycling programs; otherwise, even stained or torn cotton can sometimes be repurposed as rags or recycled into industrial materials.

    Put the keepers back neatly. Hang or fold each item as it returns. The visible neatness of an organized closet is genuinely motivating for the next 24 hours of work.

    Saturday Afternoon: The Kitchen

    The kitchen is the highest-leverage room to declutter because you use it daily. Even modest improvements have outsized quality-of-life effects.

    Cabinets and drawers. Pull out one section at a time. Throw out: expired food, the third spatula you’ve never used, the chipped mug, the dead avocado-shaped slicer, the broken thermos lid. Donate: working appliances you don’t use (the bread maker, the panini press, the second blender), serving dishes you never serve from, the second set of mixing bowls.

    The pantry. Check expiration dates ruthlessly. Donate unexpired, unopened nonperishable food to a local food bank — the EPA specifically recommends donating unspoiled food to food banks, soup kitchens, pantries, and shelters rather than throwing it out. Throw out expired food. Group remaining items by type so you can actually see what you have.

    The fridge. Pull everything out, toss expired condiments and forgotten leftovers, wipe down the shelves. This is the one task most likely to dramatically change how the kitchen feels for relatively little effort.

    The counters. Anything currently living on the counter that isn’t used daily gets put away or removed. The toaster you use weekly might earn its counter spot; the air fryer you used twice doesn’t.

    The drawer of doom. Every kitchen has it — the drawer of dead pens, takeout menus, rubber bands, and mysterious cords. Empty it completely onto the counter, throw out 80% of it, and put the remaining 20% back in some kind of order.

    Saturday Late Afternoon: Bathroom and One Closet

    The bathroom is fast: empty the medicine cabinet, the under-sink area, and any other storage. Throw out expired medications, old sunscreen (it loses potency), half-used products you stopped using, dried-out mascaras, hair products that didn’t work, ratty washcloths. Donate anything unopened that you won’t use — a shelter or charity may take them.

    Important: expired medications shouldn’t go in the trash or down the toilet. Most pharmacies operate take-back programs. Check with your local pharmacy or municipality for proper disposal options.

    For the one closet (front hall, linen, hallway), the approach is the same as the bedroom closet: empty completely, sort by the four piles, return only what passes the “do I actually use this?” test. Linen closets tend to accumulate dramatically more towels and sheets than any household needs. Most homes have enough linen for 3x the residents.

    Sunday Morning: Living Room and Entryway

    By Sunday, you’ve made enough decisions that your brain is sharper at it. Living areas tend to accumulate three categories of clutter: visible surface mess (mail, charging cables, decorative items), media (books, DVDs, magazines), and “where do I put this” zones (the chair that catches clothes, the table that catches everything).

    Surfaces first. Clear coffee tables, end tables, mantels, and consoles. Sort everything that doesn’t belong there into “goes elsewhere” or “doesn’t need to exist anymore.” Surfaces that are 50%+ empty visually feel calmer, even if every drawer behind them is full.

    Books. A genuinely difficult category. Most people overestimate how many books they’ll re-read. Walk shelf by shelf and pull anything you wouldn’t recommend to a friend. Donate books to libraries, schools, Little Free Libraries, or charities. The EPA’s recycling guidance recommends checking local schools, places of faith, charities, and nonprofits for book donation; many will accept whole boxes.

    Decorative items. Aim for 25% reduction. Keep things you actually love seeing; donate the rest. A room with a few intentional objects beats a room with dozens of forgotten ones.

    The entryway. Every shoe that doesn’t fit or get worn — donate or trash. Every jacket nobody wears — donate. Bags that have been hanging there since 2022 — gone. The entryway is the first thing you see when you walk in; a decluttered version makes the whole home feel different.

    Sunday Afternoon: Paperwork and Miscellaneous

    Paperwork is the category most people dread and procrastinate on, but it’s faster than expected if you’re decisive. The rule: most paper can be thrown out or shredded immediately. The few categories that need to be kept are smaller than people think.

    Keep: tax returns for the last 7 years; current insurance policies; deeds, titles, and major contracts; medical records; warranty papers for items still under warranty; sentimental letters (these can go in a single labeled box).

    Shred: old bank statements, expired credit card offers, old utility bills, anything with sensitive information you no longer need. A home shredder is worth owning, or shred at the bank, library, or office supply store on a scheduled shredding day.

    Recycle: old magazines, catalogs, mailers, school papers from previous years (after photographing anything sentimental).

    Miscellaneous drawers. The junk drawer in the kitchen has cousins — random drawers in side tables, desks, and dressers. They all follow the same pattern: dump out, sort, put back 20% of what was in there. Old chargers, dead batteries, mystery keys, expired coupons, broken sunglasses, business cards from people you don’t remember. Most of it goes.

    What to Actually Do with the Stuff

    This is the section most decluttering guides skip — and it’s where most decluttering attempts fail. Bags of “donations” sitting by the door for months are not decluttering; they’re just clutter in a different location. The EPA’s guidance on reducing and reusing emphasizes that donation prevents usable goods from going into landfills and benefits communities and those in need; the key is moving things out within days, not months.

    Working clothing, household items, books. Local thrift stores (Goodwill, Salvation Army, local nonprofits), churches, community centers, and shelters. The EPA notes that local churches, community centers, thrift stores, schools, and nonprofit organizations may accept a variety of donated items. Call ahead for large items.

    Working electronics. The EPA’s official guidance on electronics donation and recycling recommends donating used but still-operating electronics for reuse to extend their lives and keep them out of the waste stream. Delete all personal data first, and remove batteries (which may need separate recycling). Many manufacturers and retailers offer takeback programs. Critical: lithium-ion batteries and devices containing them should NOT go in household garbage or recycling bins — they need to go to dedicated battery recycling collection points.

    Furniture in good condition. Many thrift stores accept furniture but require it to be in clean, working condition with no major damage. Larger pieces often require advance scheduling for pickup. Local Buy Nothing groups (Facebook), Freecycle, or community marketplaces can find quick homes for items charities won’t take. For damaged or unusable furniture, check with your municipality for bulky-waste pickup days.

    Household hazardous waste. Old paint, cleaning chemicals, motor oil, batteries, fluorescent bulbs, expired medications, smoke detectors — none of these belong in regular trash. Most municipalities run periodic household hazardous waste collection days, and many pharmacies accept expired medications. The EPA’s recycling FAQ provides additional guidance.

    The drop-off plan. Schedule the donation drop-off for Sunday afternoon or, at the latest, the Monday or Tuesday after. The longer bags sit by the door, the higher the chance items get pulled back out and the decluttering reverses. If you can’t drop off immediately, at minimum put the bags in your car. Items in the car always get dropped off; items by the front door sometimes don’t.

    How to Keep It This Way

    A decluttered home will quietly re-clutter within months unless you change a few habits. The good news: the maintenance habits are small, daily, and don’t require additional weekends.

    The one-in, one-out rule. Whenever something new enters the home — a piece of clothing, a kitchen gadget, a book — something equivalent leaves. This isn’t rigid; it’s directional. Without something like this rule, household possessions only grow.

    The 10-minute daily reset. Spend the last 10 minutes of each day putting things back where they live. Mail, dishes, jackets, shoes, laundry. Done consistently, this prevents the slow accumulation that makes weekends like this one necessary in the first place.

    The quarterly mini-purge. Once every three months, spend two hours on one small zone — one closet, one drawer, one shelf. Compounds over a year into substantial maintenance without ever requiring a full weekend again.

    The “do I love it or use it?” filter at the store. Before any purchase, especially of things that will live in the home long-term, ask if you genuinely love or use it. This is the actual source of decluttering: not getting rid of things you already own, but not bringing things into the home in the first place. The EPA’s source-reduction principle is the same: not creating waste at all is more effective than recycling or reusing it after the fact.

    Common Mistakes to Avoid

    Starting with sentimental items. Old photos, letters, gifts from family members — these are the hardest decisions and take the longest. Saving them for the very end (or for a different, dedicated weekend) prevents emotional exhaustion from derailing the entire project. Decision fatigue is real and accumulates fast.

    Buying organizing supplies first. Bins, baskets, drawer dividers, and clever storage solutions are tempting before you’ve decluttered. Don’t. You don’t yet know what you’re keeping, so you don’t know what containers (if any) you’ll actually need. Buying first leads to ironic clutter — boxes intended to organize, sitting empty or repurposed for things you should have thrown out.

    Trying to do every room. A decluttering weekend that covers four to six rooms reliably produces results. A weekend that tries to cover the whole house produces exhaustion, conflict, and abandoned piles. Scope creep is the enemy.

    Letting “what if I need it someday” run the decisions. The honest answer is almost always: you can re-acquire it for a few dollars at most, and you probably won’t actually need it. Storage space has real cost (in money for larger homes, in mental load for smaller ones). Holding onto things “just in case” for years usually costs more than the rare moment of needing one of them.

    Trying to sell everything. Selling individual items on online marketplaces is time-consuming. For most items, the time investment isn’t worth the recovered money. Use the rough test: is this item worth more than $50? If not, donate it rather than trying to sell. Only the higher-value items justify the marketplace effort.

    Doing it alone when you live with someone. Decluttering shared spaces unilaterally creates resentment. Talk through which zones each person handles and which are shared decisions. Don’t toss anyone else’s stuff without permission, even if you’re sure they don’t want it.

    Done Beats Perfect

    A weekend of decluttering won’t transform your home into a magazine spread. It will produce something more valuable: a noticeably less cluttered space, a clear sense of what you actually own, and habits that prevent the same accumulation from re-occurring. The Instagram version of decluttering, with color-coded bins and perfectly folded drawers, is mostly performance. The actual benefit of decluttering is the daily small relief of opening a drawer and finding what you need, walking into a room and not feeling crowded by possessions, and having less mental load tied up in stuff.

    The single biggest predictor of decluttering success isn’t motivation or technique — it’s specificity. A specific scope, a specific schedule, specific drop-off plans for the items leaving the house. Vague decluttering plans almost always stall; specific ones almost always finish.

    Pick a weekend in the next month. Decide which rooms. Identify where the stuff is going. Then just do it — imperfectly, in 12 hours of focused work split across two days. The result will be much better than a month of intending to start “next weekend.”

    This article is for general informational and educational purposes only. For donation, recycling, and disposal options, check with your local municipality and consult the EPA’s official resources, as local rules and acceptable items vary by region.