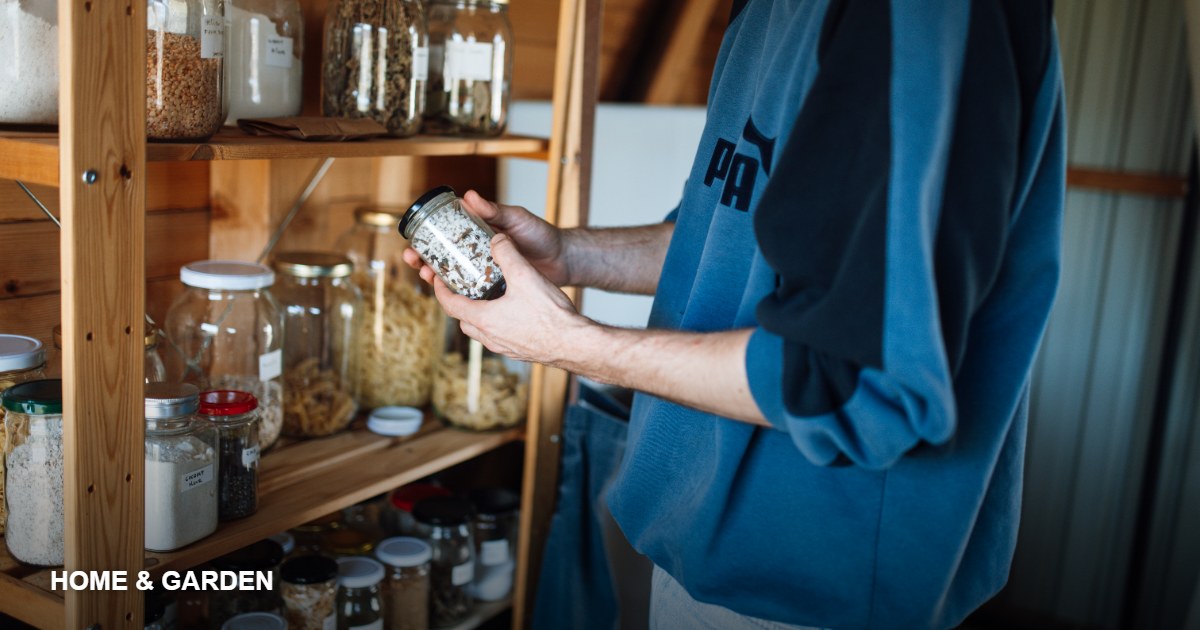
Every January, the same scene plays out in small kitchens everywhere: a burst of organizing enthusiasm, a car trunk full of matching containers, a weekend of ruthless rearranging — and by March, the Tupperware lids have formed their own anarchic state, the spice rack is alphabetical in theory only, and the counter has reverted to a landing strip for mail, keys, and one inexplicable screwdriver. The problem was never effort. It was that the system was designed for a photograph, not for the person who actually cooks there on a tired Tuesday night.

Professional kitchens — where a cook might produce two hundred meals a night from a workspace the size of a wardrobe — are not organized by aesthetics. They are organized by zones and frequency: what you use most lives closest to where you use it, full stop. That single principle, borrowed and adapted, is what separates organizing that lasts from organizing that collapses. This guide builds it step by step for the small home kitchen: the zone map, the decluttering order that prevents relapse, the vertical-space tactics that double storage, and the maintenance habit that takes ninety seconds a day.

1.The One Principle: Zones and Frequency

Open any small kitchen’s cabinets and you’ll find the same archaeological jumble: the everyday plates stacked above the roasting pan used twice a year, the mugs three steps from the kettle, the chopping boards in a different postcode from the knives. Everything has a place, but the places were assigned by cabinet size rather than by logic.

The zone system flips the assignment. Divide your kitchen into five working zones — and before touching a single shelf, sketch them on paper:

Table 1 — The five-zone map for a small kitchen

Zone What Lives Here Anchored To
1. Consumables Dry goods, cans, snacks, coffee, tea The pantry cupboard or tallest shelf
2. Non-consumables Plates, bowls, glasses, cutlery The cupboard nearest the dishwasher/sink
3. Prep Knives, boards, mixing bowls, measuring tools Your main clear counter and the drawers beneath it
4. Cooking Pots, pans, spatulas, oils, spices in daily use The hob and its immediate orbit
5. Cleaning Detergent, cloths, bags, recycling Under the sink

Within each zone, apply the frequency rule in three tiers. Daily items — your knife, the frying pan, the mugs, the oil and salt — live at arm’s reach: the counter, the rail, the top drawer. Weekly items — the food processor, the big mixing bowl — live one motion away: a low cabinet, a shelf you can reach without a stool. Rare items — the turkey roaster, the waffle iron, the cake stand — are exiled to the highest shelf, the deepest corner, or out of the kitchen entirely. The Old Farmer’s Almanac guide to organizing a kitchen makes the same core argument: store things where you use them, and give prime real estate only to what earns it daily.

“Organize for the person who cooks on a tired Tuesday night, not for the photograph.”
The Adlroom Home Desk

2.The Declutter Comes First — In This Exact Order

Organizing clutter only moves it. The average kitchen holds a third more equipment than its cook uses, and in a small kitchen that third is the difference between a system and a pile. But decluttering fails when it starts with the hardest decisions, so the order below is engineered to build momentum — easy wins first, judgment calls last.

  1. Duplicates first. Three vegetable peelers, four wooden spoons, two can openers — keep the best one of each, box the rest. No emotion required, which is exactly why it goes first.
  2. Broken and incomplete items. The pan with the loose handle, the lidless containers, the chipped glasses. If you haven’t fixed it in six months, you won’t.
  3. Expired pantry goods. Check dates on spices, baking powder, and condiments — the silent population of every small kitchen. Utah State University Extension’s food storage guidance is a useful reference for what genuinely keeps and what doesn’t.
  4. The “used in 12 months?” pass. Everything remaining gets one honest question: did it earn its space in the last year? The single-purpose gadgets — the avocado slicer, the egg poaching pod — almost never survive this question. Be ruthless here; this is where the third comes from.
  5. Finally, the sentimental items. By now you have momentum and empty space, and the decisions that felt impossible at 9 a.m. feel obvious by noon.

The Box Test for Fence-Sitters

Can’t decide on an item? Box it, date the box, and store it out of the kitchen. Anything you haven’t retrieved in three months goes to donation unopened — you’ll find you don’t even remember what’s inside, which is the answer.

3.Reclaiming the Counter: The Landing-Strip Problem

In a small kitchen, counter space is the scarcest resource of all — and the first thing clutter attacks. The physics of it are worth understanding: items land on counters not because people are lazy but because no easier destination exists. The mail lands on the counter because the counter is the first flat surface inside the door. The solution is never “be tidier”; it is to build an easier destination — a wall-mounted letter sorter by the door, a hook for keys, a small tray that defines the only sanctioned drop zone.

For appliances, apply the honest frequency test. The toaster used daily earns its counter spot; the stand mixer used monthly does not. Every appliance exiled to a cabinet returns its footprint to prep work, and in a small kitchen the prep zone is where cooking pleasure lives or dies. A useful target from professional practice: keep at least one continuous stretch of counter — even just 60 centimeters — permanently clear. That clear patch is not wasted space; it is the kitchen’s workshop, and everything else is storage.

4.Go Vertical: Doubling Storage Without Renovating

Small kitchens are rarely short on space — they are short on used space. Between the top of the cabinets and the ceiling, on the inside of every cabinet door, along the wall beside the fridge, and in the dead air above the sink, the average small kitchen hides several square meters of unused storage. Reclaiming it requires no renovation, only hardware:

Table 2 — The vertical playbook: dead space into working storage

Dead Space Fix Cost
Inside cabinet doors Adhesive hooks and caddies for lids, wraps, measuring spoons, cleaning gloves $5–15
Under shelves Clip-in under-shelf baskets for wraps, foil, napkins; under-shelf mug hooks $8–12
Wall beside the stove Rail with S-hooks for utensils, oven mitts, and the daily-use pan $10–20
Backs of tall shelves Shelf risers that double each shelf’s levels; tiered spice steps so back rows stay visible $8–15
Side of the fridge Magnetic racks for spices, paper towels, or a small shelf unit $10–25
Deep cabinet depths Pull-out baskets or lazy Susans so nothing dies in the back row $15–30
Above the sink Over-sink roll-up drying rack — drying space that vanishes when not needed $12–20

Two rules govern all vertical additions. First, measure before you buy — the inside of cabinet doors varies, and an organizer that prevents the door closing is clutter wearing a uniform. Second, heaviest lowest: cast iron and stacks of dishes live below the waist, light and rare items above the shoulders. The Almanac’s roundup of kitchen storage ideas covers more of these small-space tactics, from tension rods to toe-kick drawers.

5.The Starter Kit: What to Buy (and What to Skip)

The organizing industry would like you to believe the transformation requires a full cart of matching systems. It doesn’t. Below is the honest shopping list for a small kitchen — the handful of items that earn their price, and the famous traps that don’t.

Table 3 — Buy these, skip those

Worth Buying Why Usually Skippable
Shelf risers (2–3) Instantly doubles usable shelf levels; the single best value in organizing Full matching jar sets for every ingredient
Airtight containers for 5–8 daily staples Fresher food, visible fill levels, ends duplicate buying Specialized single-food containers (avocado keepers, banana cases)
A rail with S-hooks near the stove Moves the six daily tools off the counter permanently Elaborate drawer insert sets measured for drawers you don’t have
Tiered spice steps or a turntable Back rows stay visible; spices stop dying in duplicate Wall-mounted spice racks that only fit one brand’s jars
Pull-out baskets for deep cabinets The back row becomes reachable; nothing expires unseen Custom built-in pull-outs (lovely, but hundreds of dollars)
Over-door rack or adhesive caddies Claims the cabinet-door space every kitchen wastes Label makers (tape and a marker work identically)

Total outlay for the full “worth buying” column typically lands between forty and seventy dollars — less than one decorative jar set — and every item solves a named problem rather than a vague aspiration. Buy after measuring, install after decluttering, and add nothing that doesn’t correspond to a row in this table or a frustration you’ve personally felt in the last month.

6.The Pantry System That Survives Real Life

Small kitchens rarely have a pantry, which means dry goods scatter across three cabinets and no one ever knows if there’s rice. The fix is the “one inventory” rule: all dry goods live in exactly one defined territory — even if that’s a single shelf — so a glance answers “do we have pasta?” without opening three doors.

Within that territory, decant strategically rather than universally. The decanting craze — every grain into a matching jar — photographs beautifully and fails in practice for most households, because it adds a chore to every grocery trip. The pragmatic version: decant only the five to eight ingredients you use weekly (flour, rice, pasta, oats, coffee) into airtight containers; everything else stays in its original packaging, grouped by category on the shelf. Airtight containers for the daily staples are the one purchase that genuinely pays — they keep food fresh longer, stack predictably, and show fill levels at a glance, which quietly ends the duplicate-purchase cycle of discovering three half-used bags of basmati.

Adopt the grocery-store rule of first in, first out: new items go behind old ones, and opened items move to the front. It takes no extra time once habitual, and it single-handedly prevents the archaeology of expired goods at the back of the shelf.

7.The 90-Second Reset: Why Systems Outlive Tidying

Here is the uncomfortable truth about kitchen organization: the organizing is the easy part. What determines whether your kitchen looks the same in June as it did in January is the daily reset — and it works only because the zone system makes it possible. When every item has a home one motion from where it’s used, “putting the kitchen away” takes ninety seconds after dinner: pans back on the rail, knives in the block, the counter wiped and cleared, tomorrow’s kettle set. Without zones, the same task takes ten minutes and gets skipped; with zones, it becomes as automatic as locking the door.

The Maintenance Schedule in Full

Daily: the 90-second reset after dinner. Weekly: fridge sweep before shopping — use what expires soon, wipe one shelf. Monthly: one drawer or shelf gets the five-minute once-over; rotate through the kitchen so everything gets attention four times a year. Seasonally: a ten-minute frequency audit — if the ice cream maker has occupied prime space through winter, it moves.

8.Six Organizing Mistakes That Guarantee a Relapse

  1. Buying organizers before decluttering. Containers bought for clutter are just prettier clutter. Declutter first, measure second, buy third — in that order, always.
  2. Organizing for looks over reach. The color-coordinated spice alphabet collapses the first time someone cooks in a hurry. Group spices by cuisine or frequency instead — the ones you grab weekly at the front, regardless of alphabet.
  3. Storing by category instead of by use. “All baking things together” sounds logical until the daily olive oil lives with the annual sprinkles. Zone by task, not by object type.
  4. Overfilling prime space. A drawer you must unpack to reach one tool is a drawer whose contents will migrate to the counter. Prime real estate holds a few daily items, loosely.
  5. Ignoring the household’s real habits. If everyone makes coffee at the counter by the fridge, the coffee station belongs there — even if it looks better elsewhere. Systems fight habits and lose.
  6. Skipping the reset ritual. No zone map survives without the ninety seconds. The system and the ritual are one product; buy both or neither.

9.Frequently Asked Questions

How long does a full small-kitchen reorganization take?

For a typical small kitchen: one evening to declutter (following the order in section 2), one morning to map zones and rehome everything, and an afternoon to install vertical fixes. A weekend, in other words — plus thirty days of the daily reset before the system runs on autopilot.

What if I rent and can’t drill into walls?

Nearly every vertical tactic has a no-drill version: adhesive hooks and caddies rated for real weight, tension rods inside cabinets, over-door racks, magnetic strips on the fridge, and freestanding shelf risers. The playbook in Table 2 was built with renters in mind.

Should I decant everything into matching jars?

No — decant only your five to eight daily staples, and let the rest live in original packaging grouped by category. Universal decanting is a maintenance tax most households stop paying within a month, and abandoned decanting systems are themselves a form of clutter.

How do I keep a shared household following the system?

Two tactics work. First, make the correct action the easiest action — the tea towels live where hands reach for them, not where you’d prefer they live. Second, label the contested zones: a small label inside the glasses cabinet and on the spice shelf does more for household compliance than a hundred reminders.

What’s the highest-impact single change?

Clearing one permanent stretch of counter. It’s the cheapest fix in this guide, costs nothing, and changes how the entire kitchen feels to cook in. Everything else builds from there.

How do I keep the system from sliding back into chaos?

Two habits protect everything you’ve built. First, the one-minute reset: after every cooking session, return each tool to its zone before you sit down to eat — sixty seconds, no exceptions. Second, a quarterly audit: four times a year, pull everything out of one zone, wipe the shelf, and put back only what you’ve used since the last audit. Systems fail all at once or not at all; the audit keeps you in the second category.

Sources & Further Reading

This guide draws on The Old Farmer’s Almanac guides to organizing your kitchen and kitchen storage ideas, and Utah State University Extension’s food storage research. All external links were verified live at publication. Growing fresh ingredients for that newly organized kitchen? See our guides to windowsill herbs and balcony container gardening.

A small kitchen organized by zones doesn’t feel small — it feels efficient, in the way a ship’s galley or a bistro line feels efficient: everything present, nothing wasted, one motion to anything. Do the declutter, draw the zone map, protect the clear counter, and keep the ninety seconds. The rest maintains itself.